Herringbone Wood Floor In Wausau Wisconsin
Posted by Aaron Schaalma
Table of contents
Looking for a modern execution of a classic herringbone wood floor?
Parquet is a classic pattern that is still used today. Herringbone is not the same as Chevron but is one of the main parquet patterns which includes basket weave, picture frame, chevron and the herringbone pattern.
I had the pleasure of installing a herringbone wood floor pattern with maple wood and a light finish. In this post I walk through an overview of my process, the challenges and solution for this project in Wausau, Wisconsin.
What Kind of Herringbone Wood Floor Did the Client Want?
This client was so excited about a new wood floor that she scheduled the job way in advance. This allowed her family to go on vacation while I worked on this project in their absence (which is what I recommend if reflooring an entire home). The client asked for a wide plank maple floors for one of the rooms.
Is Herringbone Wood Floor a Good Idea?
This house had existing 2 ¼ wood floors.The issue may not be obvious to everyone, but having wide plank next to 2 ¼ wood was going to look strange. So I came up with a solution to use a wider plank that the client asked for, but to do it in herringbone. This solution provided a way to distinguish the two rooms from each other and it also blended the two to create a very classic look in a modern white tone.
Herringbone like other patterned parquets must work well with the house and of course the taste of each client. It is a good idea if you are able to properly install it and it blends well with other features of the house.
Is it Difficult to Lay Herringbone Flooring?

Happy that the client loved this wide plank herringbone wood floor idea, but this project was not straightforward. It required a lot of manual cutting and applying two grooves per piece.
Hand-Cutting And Grooves

The herringbone pattern requires every piece to be hand cut and measured. I would constantly check to ensure things remain aligned.

Each end also needed to be grooved and slide through a router. That’s a total of 1,200 pieces which ultimately means 2,400 grooves to apply!

Preparing The Floors
Once I had all the pieces ready it was time to prepare the floors. I removed the base board and carpeting so that I can prepare the subfloors by sanding and nailing down everything tight so there were no squeaks
Moisture Barrier

Anytime wood floors are glued and nailed down, it’s vital to apply a moisture barrier. I applied one coat of moisture barrier and installed the floor using strip glue (or also known as glue-assisted) along with the nails.

Finishing Touches

My personal assessment of the rooms and house in general led me to go with no border around the rooms. A border works well and looks very sharp with certain rooms, but for this project having no border resulted in a much cleaner look that is consistent with the overall appearance.
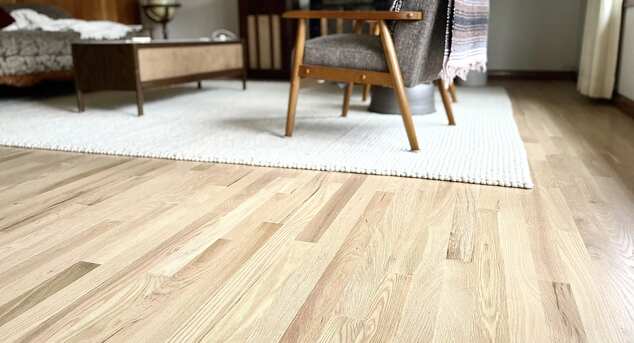
Lastly, I sanded the entire first floor then finished with Rubio Monocoat.
Final Results of a Herringbone Wood Floor