Speed of Light Green Bay Refinish
Posted by Aaron Schaalma
We see ourselves as more than just a wood flooring company. We see ourselves as problem solvers that just so happen to create beautiful, warm, inviting spaces that are wood floors.
We first met with our client to see how our services could assist them with their vision. A couple of concerns they had were the amount of mess or dust and also how long they had to stay off their wood floors. We were able to solve all these concerns for them. One, we have a great dustless option. This consists of a large commercial vacuum and then also an air scrubber (BuildClean). Second, concerning the time factor, we solved this by going with a UV finish option.
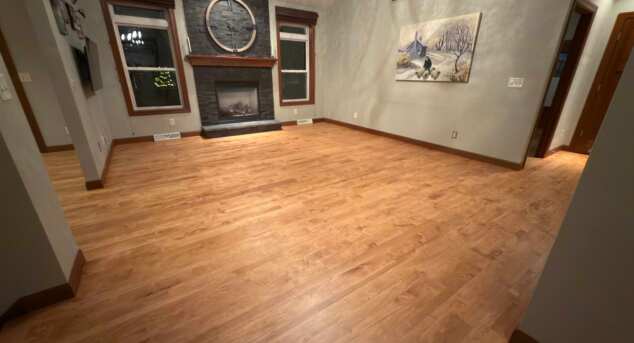
This Green Bay refinish consisted of stairs, hallway, and kitchen area. The floors were scratched and worn in areas and had an amberish color finish on them. The reason the finish was amber was due to the fact that the previous coating used on the wood floors was a UV sensitive product (not to be confused with UV cured finish). This means that as light hits the finish, it changes color and ambers.

Now onto refinishing the hardwood floors. We completely refinished these floors and stairs by sanding off the old coating. The stairs were a lot of detail work because all the wood in-between the spindles had to be scrapped by hand. You may ask why by hand? This is because of how the spindles are designed (code says no bigger gap than a 4" sphere can pass through). The bottom of the spindles were closer than 3". Thus, it took a lot of work to scrape and sand the wood in-between all the spindles.

Once the floor was all sanded, we then sealed it a primer that was going to leave the floor lighter in color. This achieved a nice contrast with the darker trim, giving it a nice appeal to the spaces. We then applied one coat of UV finish and allowed it to dry 2-4 hours. Once that coat dried, we cured the UV finish on the hardwood floors using an ultraviolet light machine. The finish is then instantly cured. The next day we came back in and buffed the floor to smooth out any raised grain from the sealer and finish. We vacuumed, tacked, and applied another coat of UV finish. Once again, we let it dry and then cured the finish. As soon as we were done curing the hardwood floors, the finish was as hard as it will get which allows you to immediately move furniture and rugs back in place. The house is clean, virtually dust-free, and ready for you to enjoy.
(Refinishing steps)


(After)
If you are in the Green Bayarea and looking to have your hardwood floors refinished, contact us! We'd love to see how we can assist you.