The Small Details: What Interior Painting Taught Me About Wood Floor Finishing
Posted by Aaron Schaalma
I recently had some interior painting done on the trim in my home. You might be asking how that relates to wood flooring. What I realized is that not everyone approaches the final coat of paint—or wood floor finish—with the same level of preparation.
Why is this a big deal? I'm going to tell you how the smallest details create the biggest difference in the final appearance.
The key foundation to any beautiful wood floor is the sanding process. You need a super flat surface, and excellent sanding is an absolute must for the finish to look great. That's only part of the process, however. You can have an awesomely sanded floor, but do a mediocre job of applying the finish, and it won't look great—and vice versa. Every step works together.
Let's shift our focus to the prep work for the final coat of finish.
When I am getting ready for that final coat, I follow a specific process to help me achieve the desired look every single time. It is not a fast process by any means. In fact, the final coat of wood floor finish will take me twice as long, if not longer, than the first coat.
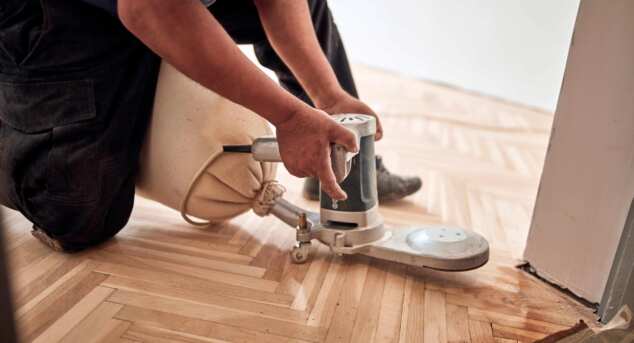
The Abrading Process
Here’s a breakdown of my final coat prep ritual.
I get down on my hands and knees with a special, fine paper made for abrading wood floor finishes. I like to skip the sanding block and instead use my hand. This allows me to feel any tiny debris that might have gotten caught in the edges during the first coat.
After the edges are handled, I use the same abrasive paper with a 16” buffer to abrade the rest of the floor. Depending on the specific floor and how it looks—this is where expertise comes in—I may even buff it a second time.
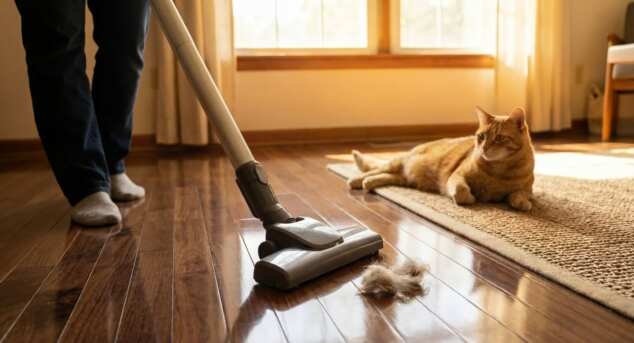
Cleaning and Environmental Control
Once the buffing is complete, I go around the entire room with a brush tool on the end of the vacuum, meticulously cleaning baseboards, edges, corners, HVAC vents, window sills, and any other areas that may be dusty or dirty. While it's impossible to make it perfectly clean, I try my very best.
Next, I address the environment. I turn down the thermostat in the winter and up in the summer so the HVAC unit doesn’t turn on while I'm applying the finish or when it's drying. Why is this important? You are trying to keep air movement at a minimum so small particles don't move around and so the finish doesn't dry too fast.
The Final Tacks and Application
Before I touch the finish, I put on my "coating crocs" and roll up the bottom of my pants. This simple step prevents me from tracking in dirt or letting small things drop onto the clean floor.
Then, I tack the floor with a microfiber mop. I don't do this just once or twice—I do it at least three times until I am completely satisfied with how the mop head looks. Only after the floor is clean and spotless am I finally ready to apply the finish.
When I apply the finish, I typically don't listen to music or anything else because I want to hear the roller and how it sounds as I’m rolling the finish. This is where all that experience and training comes into play!
I will either roll out of a bucket or pour the finish directly onto the floor. Most of the time, I prefer to pour on the floor because it makes it easier for me to see where I have been.
I cut in with a brush along all the edges and then roll the field. You have to make sure you apply the finish consistently. This is where hearing the roller comes into play. Otherwise, you will get missed or heavy spots.
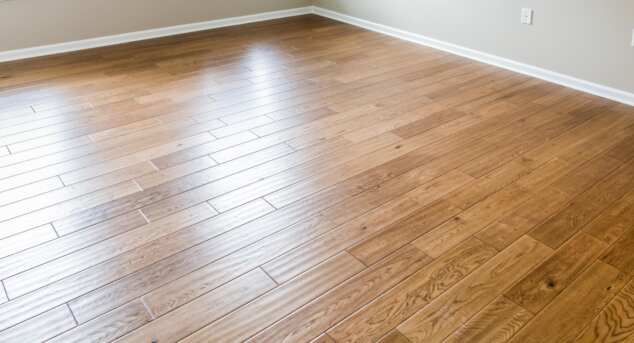
Ultimately, achieving a nice, smooth wood floor finish is all about rhythm and consistency. It’s the small details in the prep work that make the biggest difference in the final product you'll be looking at for years to come.
Here’s a video of a final project.
In Wisconsin? We can help.
If you’re in central or northeastern Wisconsin, Signature Custom Flooring can bring curated samples to your home, create on-floor stain tests, and guide you through sheen, texture, and layout—and then install with dust-managed methods and durable, low-odor finishes.
Ready to choose hardwood colors and designs you’ll love for years? Contact Signature Custom Flooring for expert, local guidance.