Transforming Your Space with Wide Plank White Oak Flooring
Posted by Aaron Schaalma
Have you ever found yourself uninspired by the drabness of your space, particularly due to the carpeting? Elevating your space with wood floors can be a transformative way to change the look and feel of your environment. Personally, I appreciate the timeless appeal of many things. This is why, whether it's style, furniture, or interior design, timeless styles never look dated. Hardwood floors embody this timelessness.
In this blog post, I will take you through the process of transforming a space from carpeting to the splendor of wide plank white oak flooring. This project presented some unique challenges, starting with the presence of concrete floors, the need for in-floor heating, and the choice of wide plank flooring. Are you ready to dive into this project and see how we addressed these challenges? I know I am!
Select the Right Hardwood Flooring
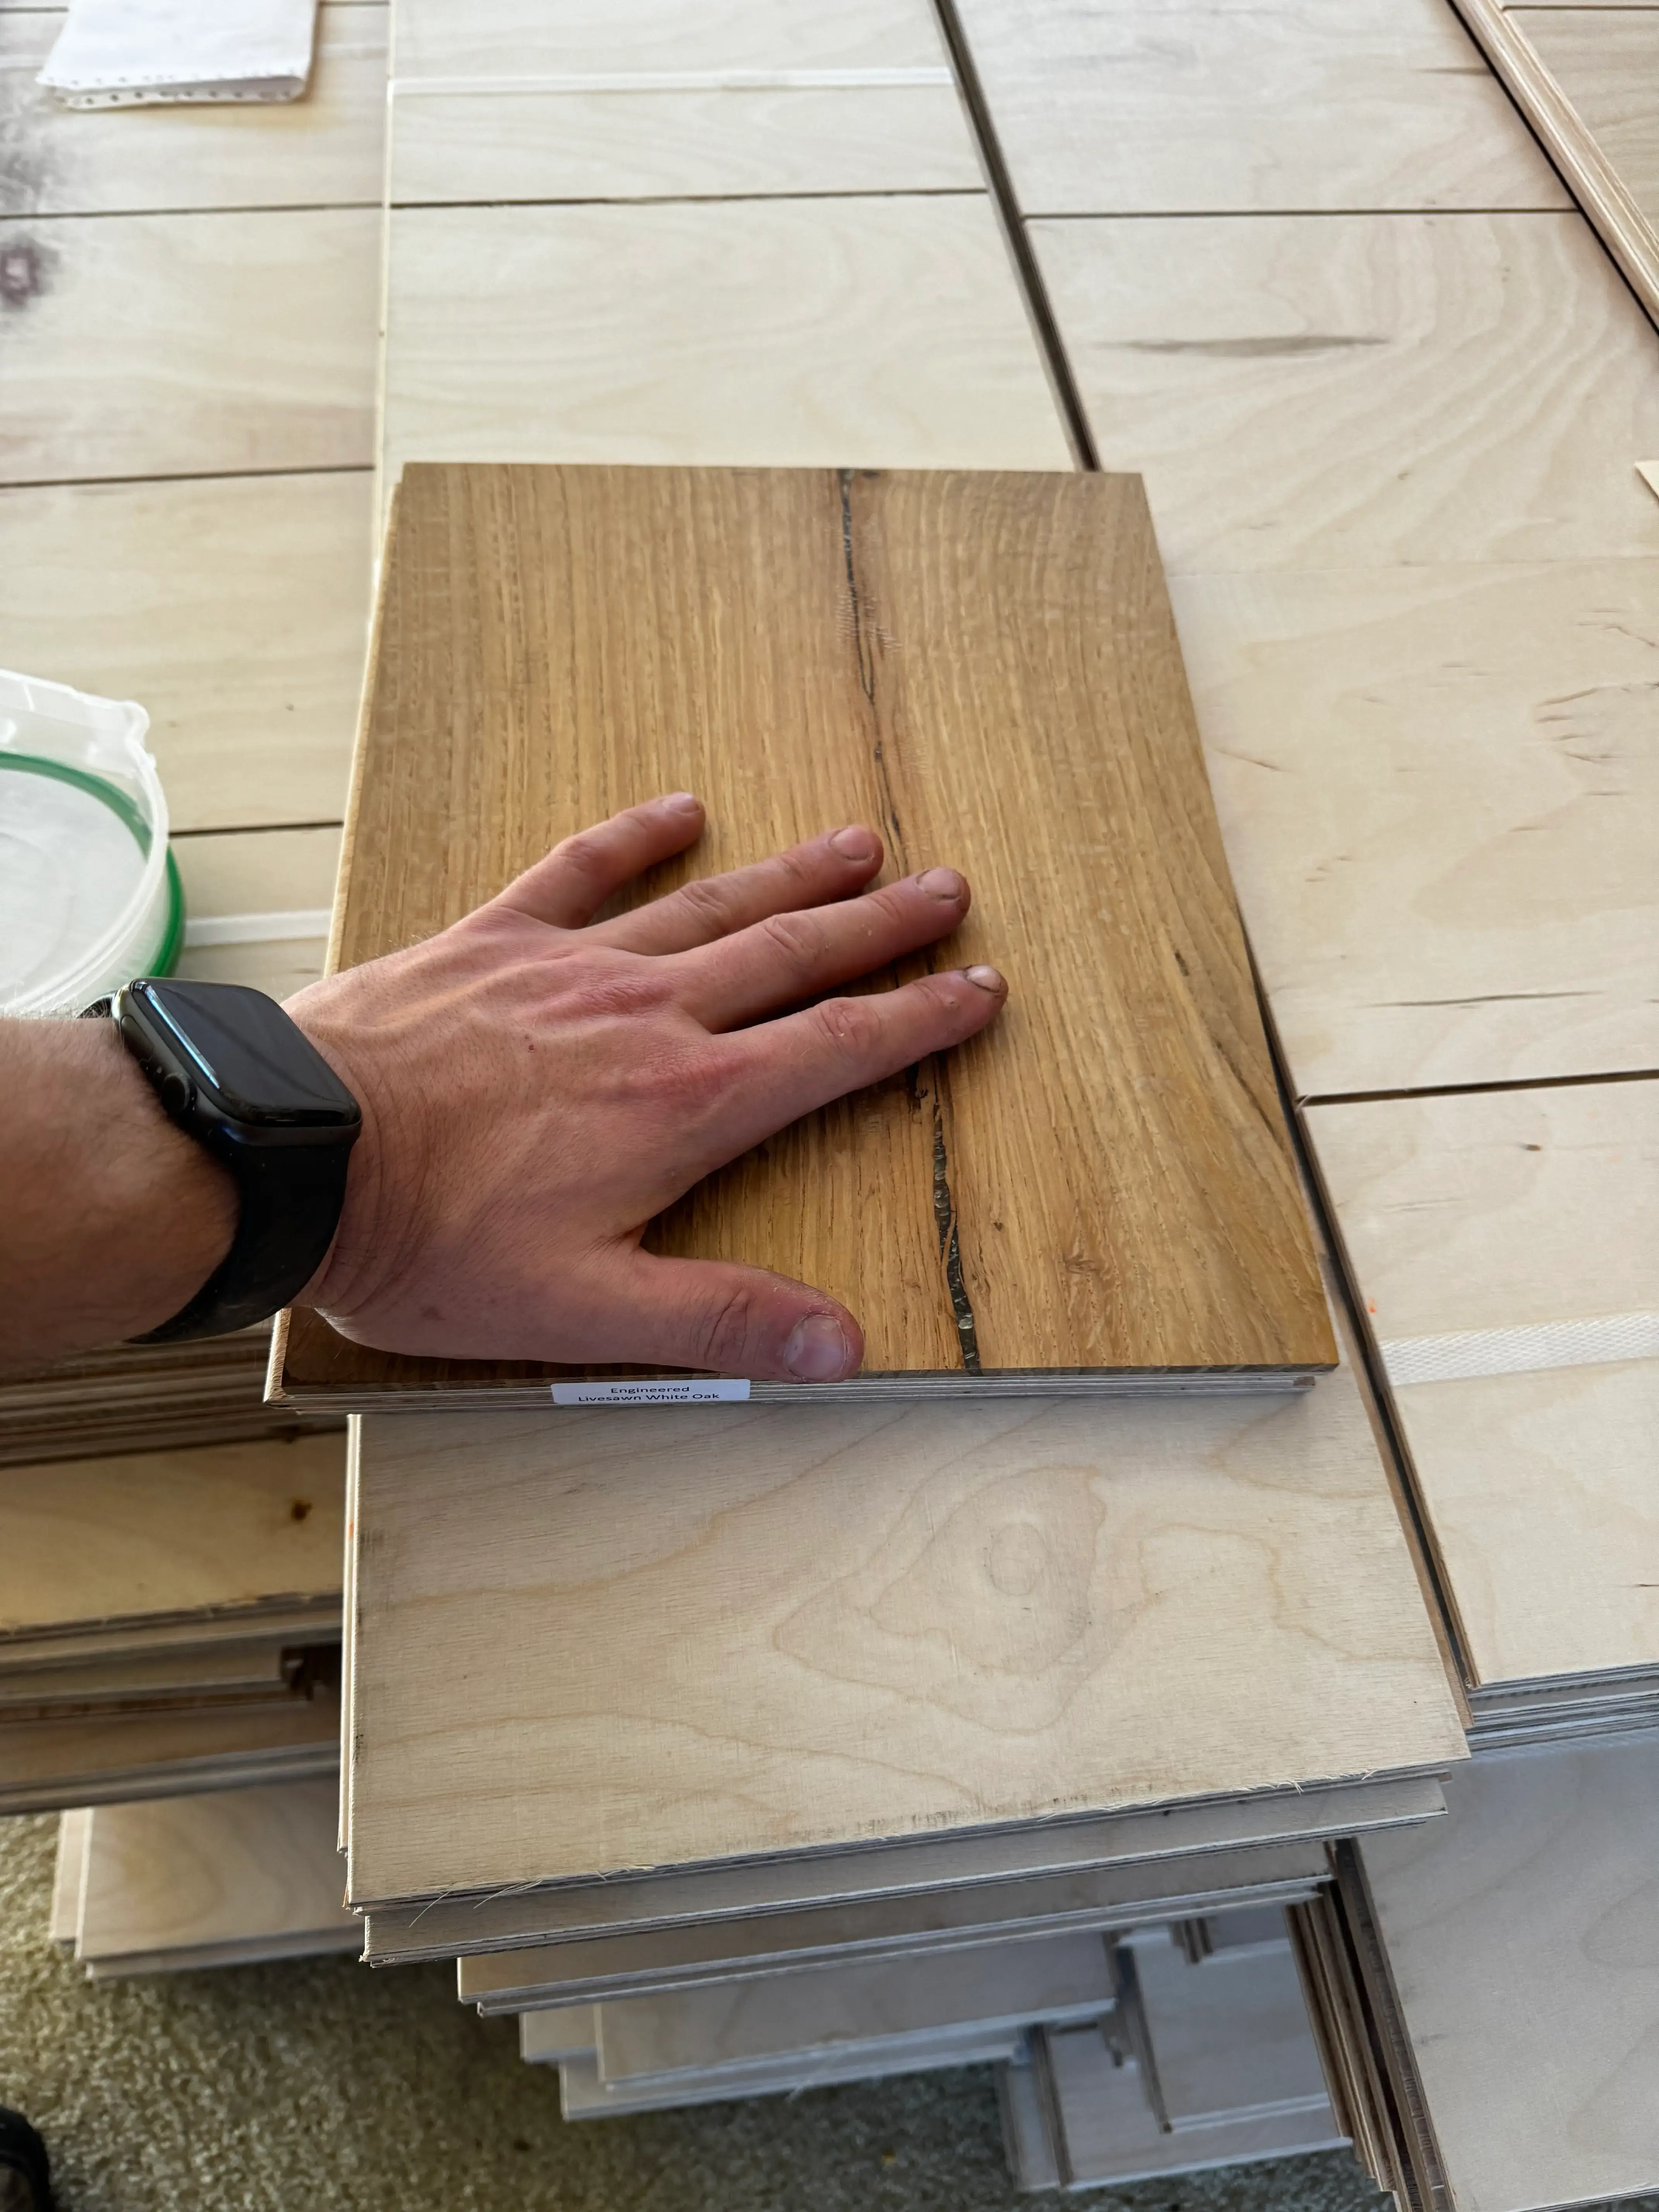
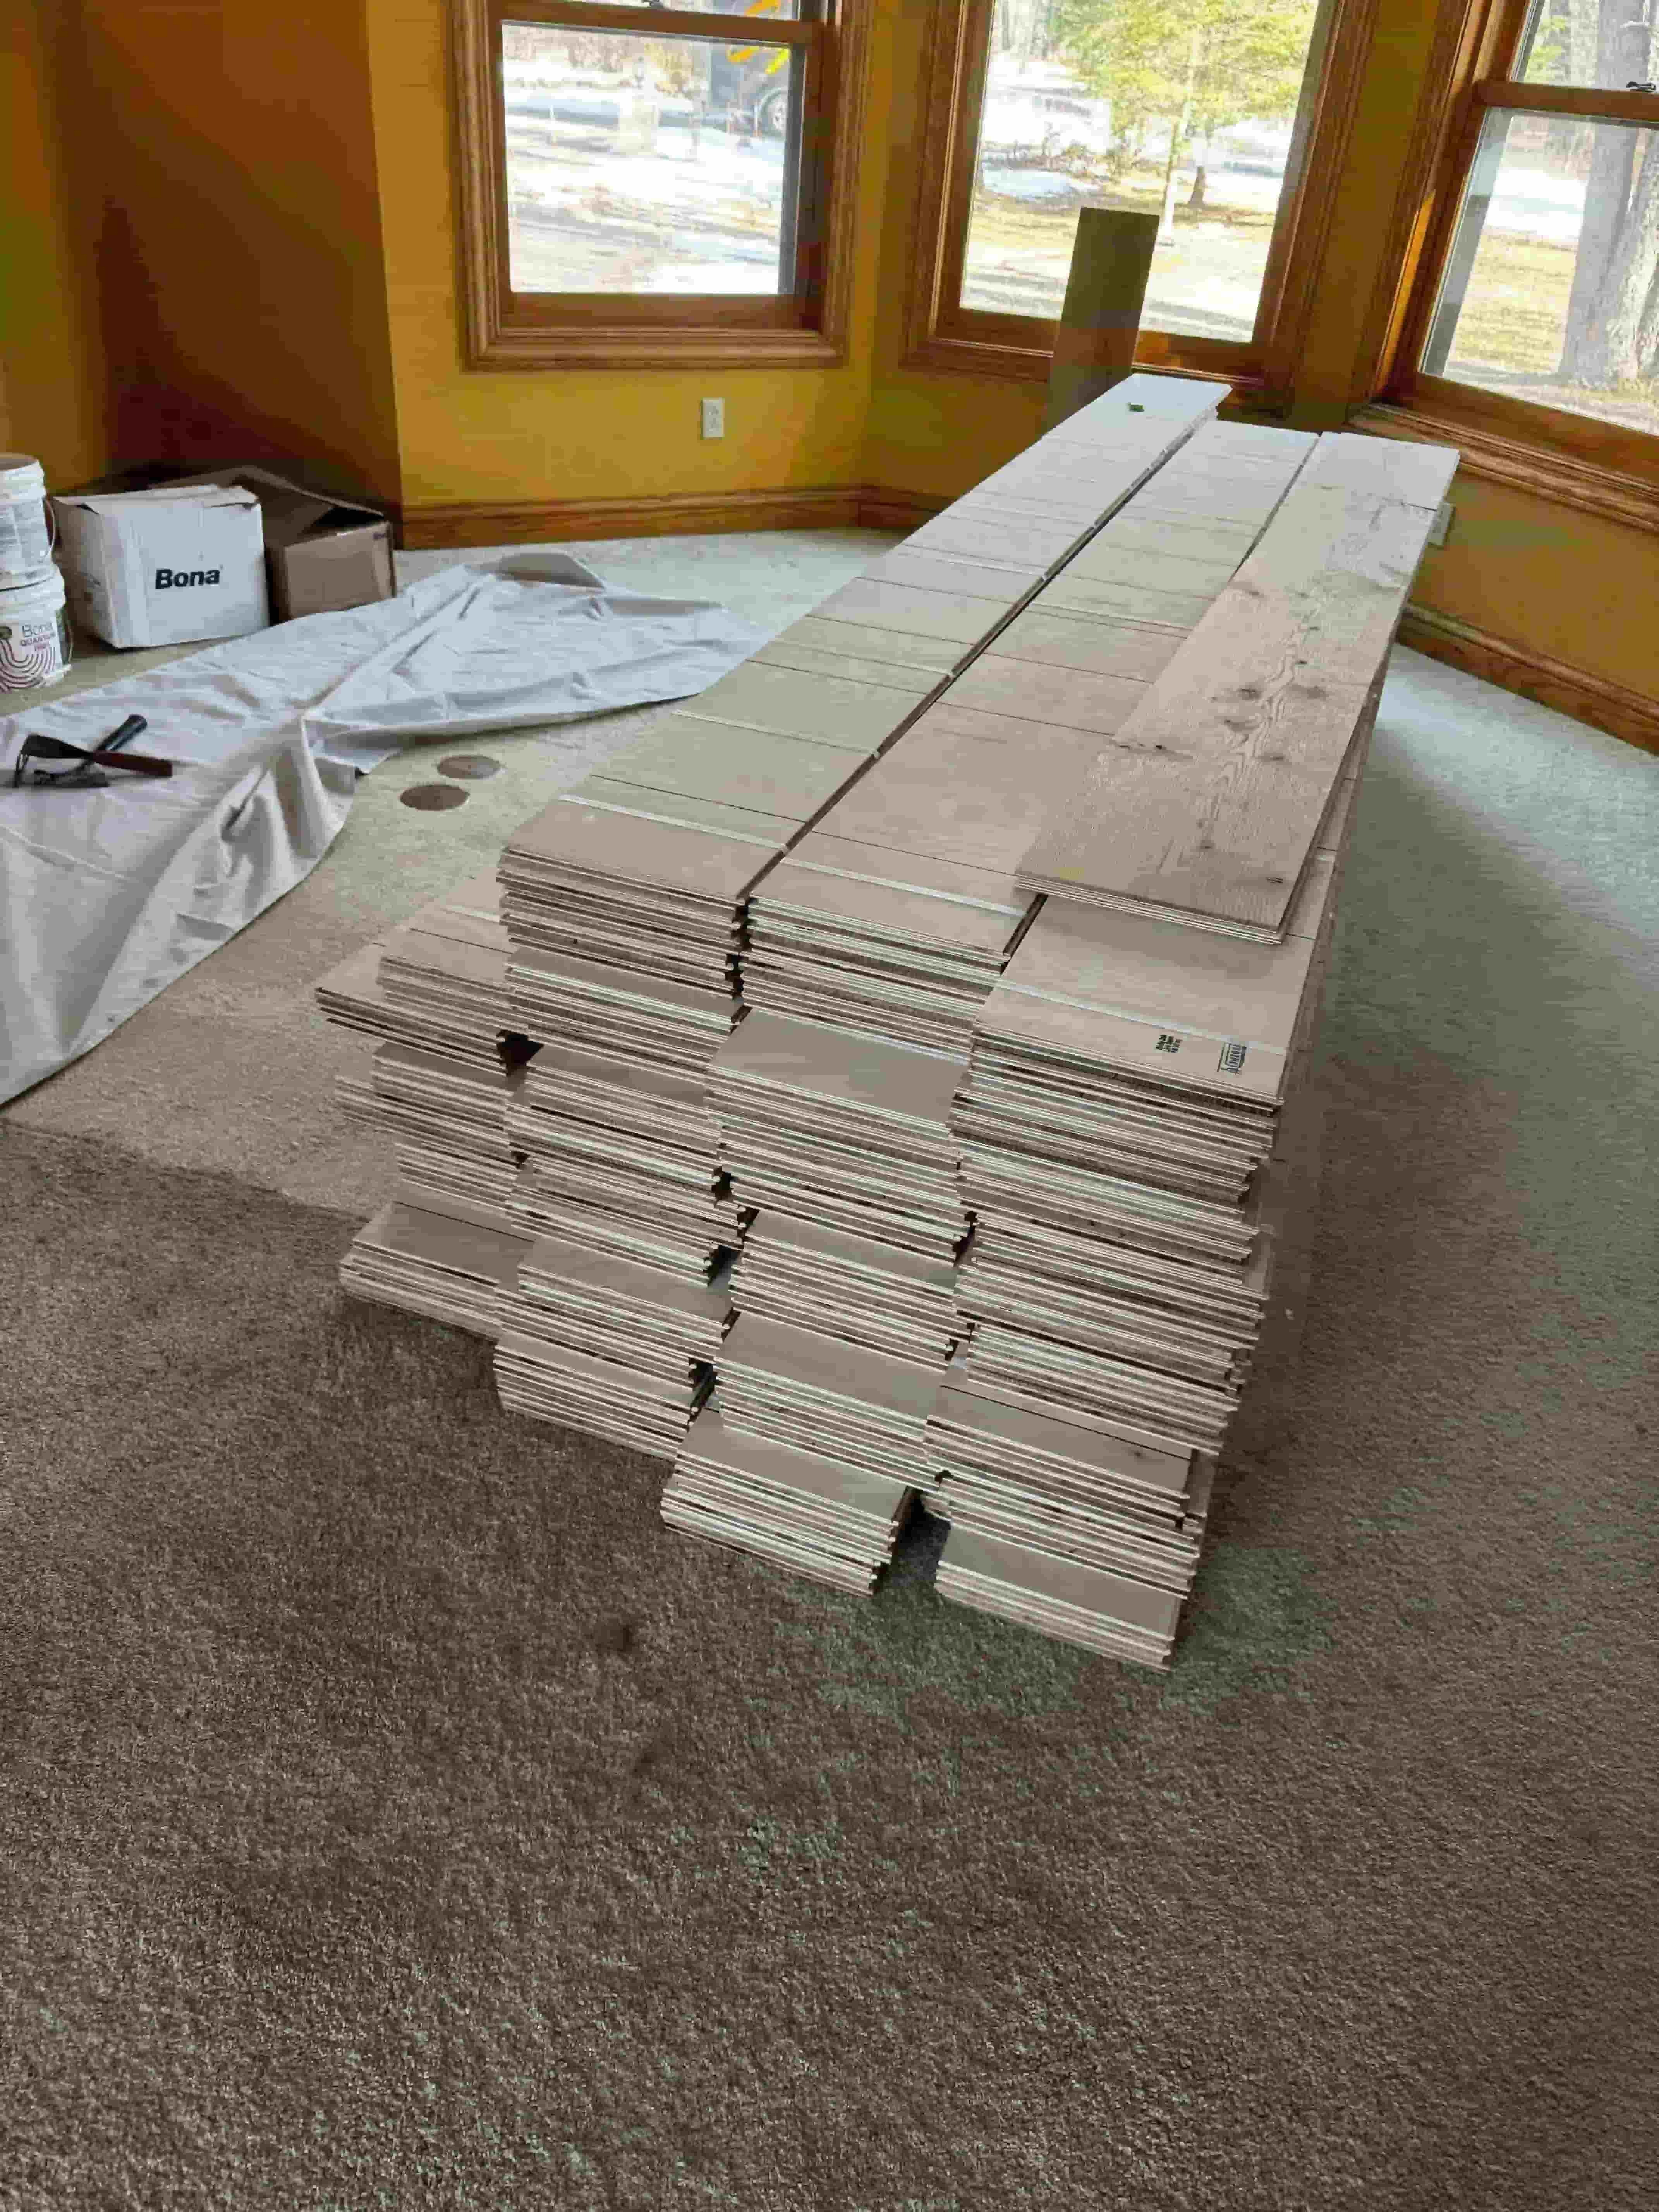
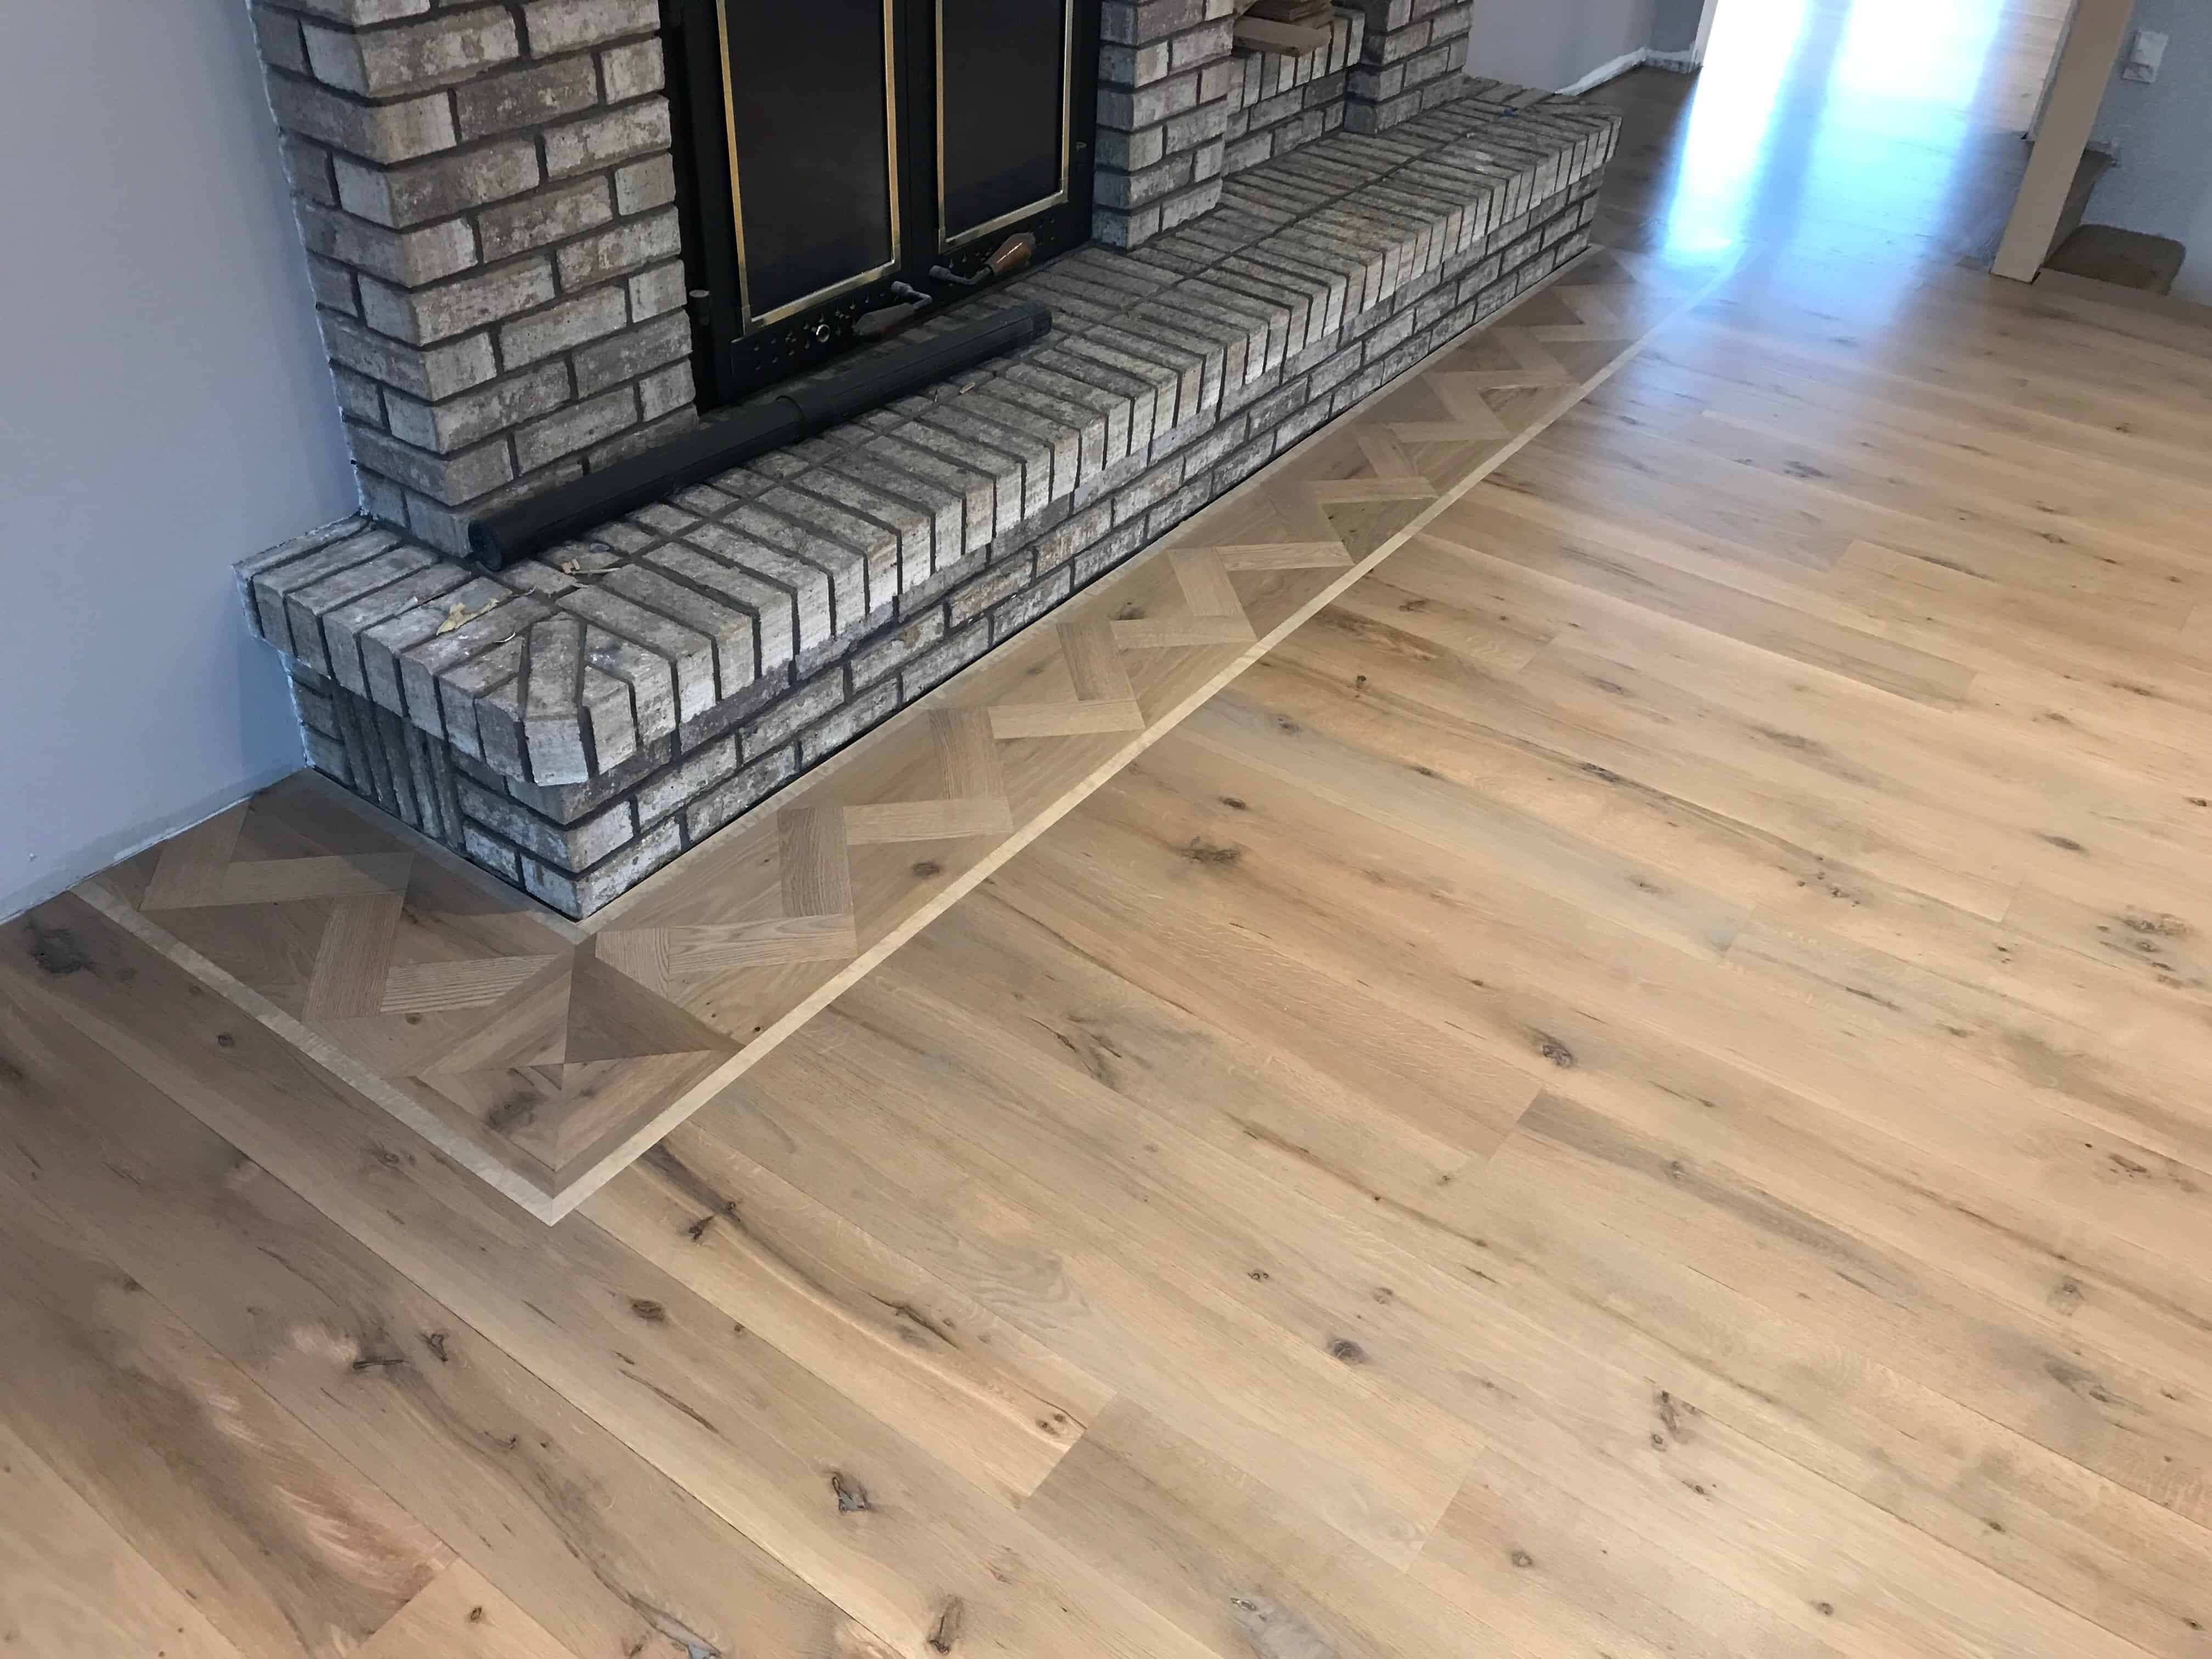
When meeting with my client to discuss the project, I decided on a 9.25” live-sawn engineered white oak floor from Sheoga. There are a couple of reasons behind this specific choice of width and cut.
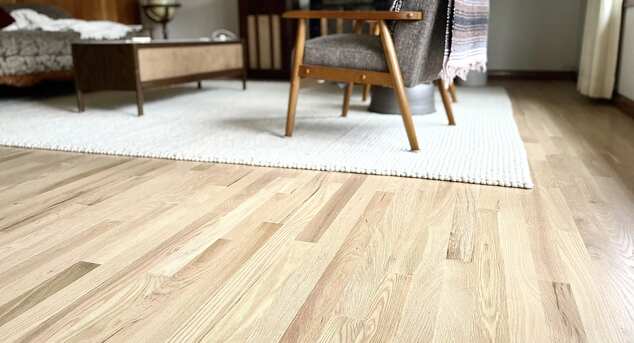
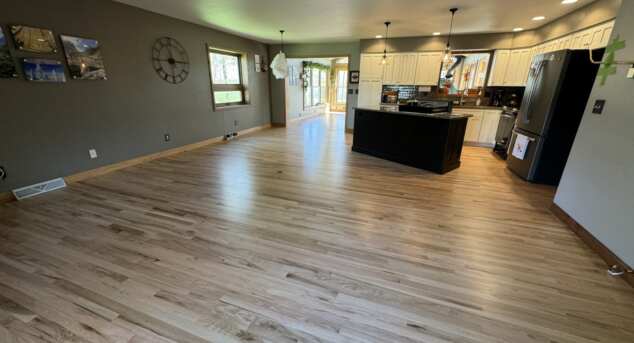
Firstly, the grandness of the space had to be taken into account. The total area of the two rooms amounted to 900 square feet. With such expansive rooms, we aimed to maintain a calm appearance while ensuring that the flooring did not detract from the stunning lake views. Opting for wider plank hardwood, with lengths ranging from 3’ to 10’, achieved exactly that.
Once the width was finalized, it became clear that an engineered floor was necessary for several reasons. Given that the installation was on concrete and the wide plank design was chosen, ensuring the stability of the floor was crucial, especially with the in-floor heating system. It's natural to wonder whether an engineered plank floor can be sanded multiple times, akin to a full ¾” solid floor. The answer is yes! I selected a reputable manufacturer that offers at least a 5mm wear layer, which is essential for ensuring the longevity of the floor. Sheoga's products boast a generous 6mm wear layer, and the quality of their milling is exceptional. Why is good milling important? It minimizes imperfections, reduces the need for excessive sanding of the wear layer, and results in better alignment, despite the slightly higher cost. Essentially, it ensures a superior overall finish.
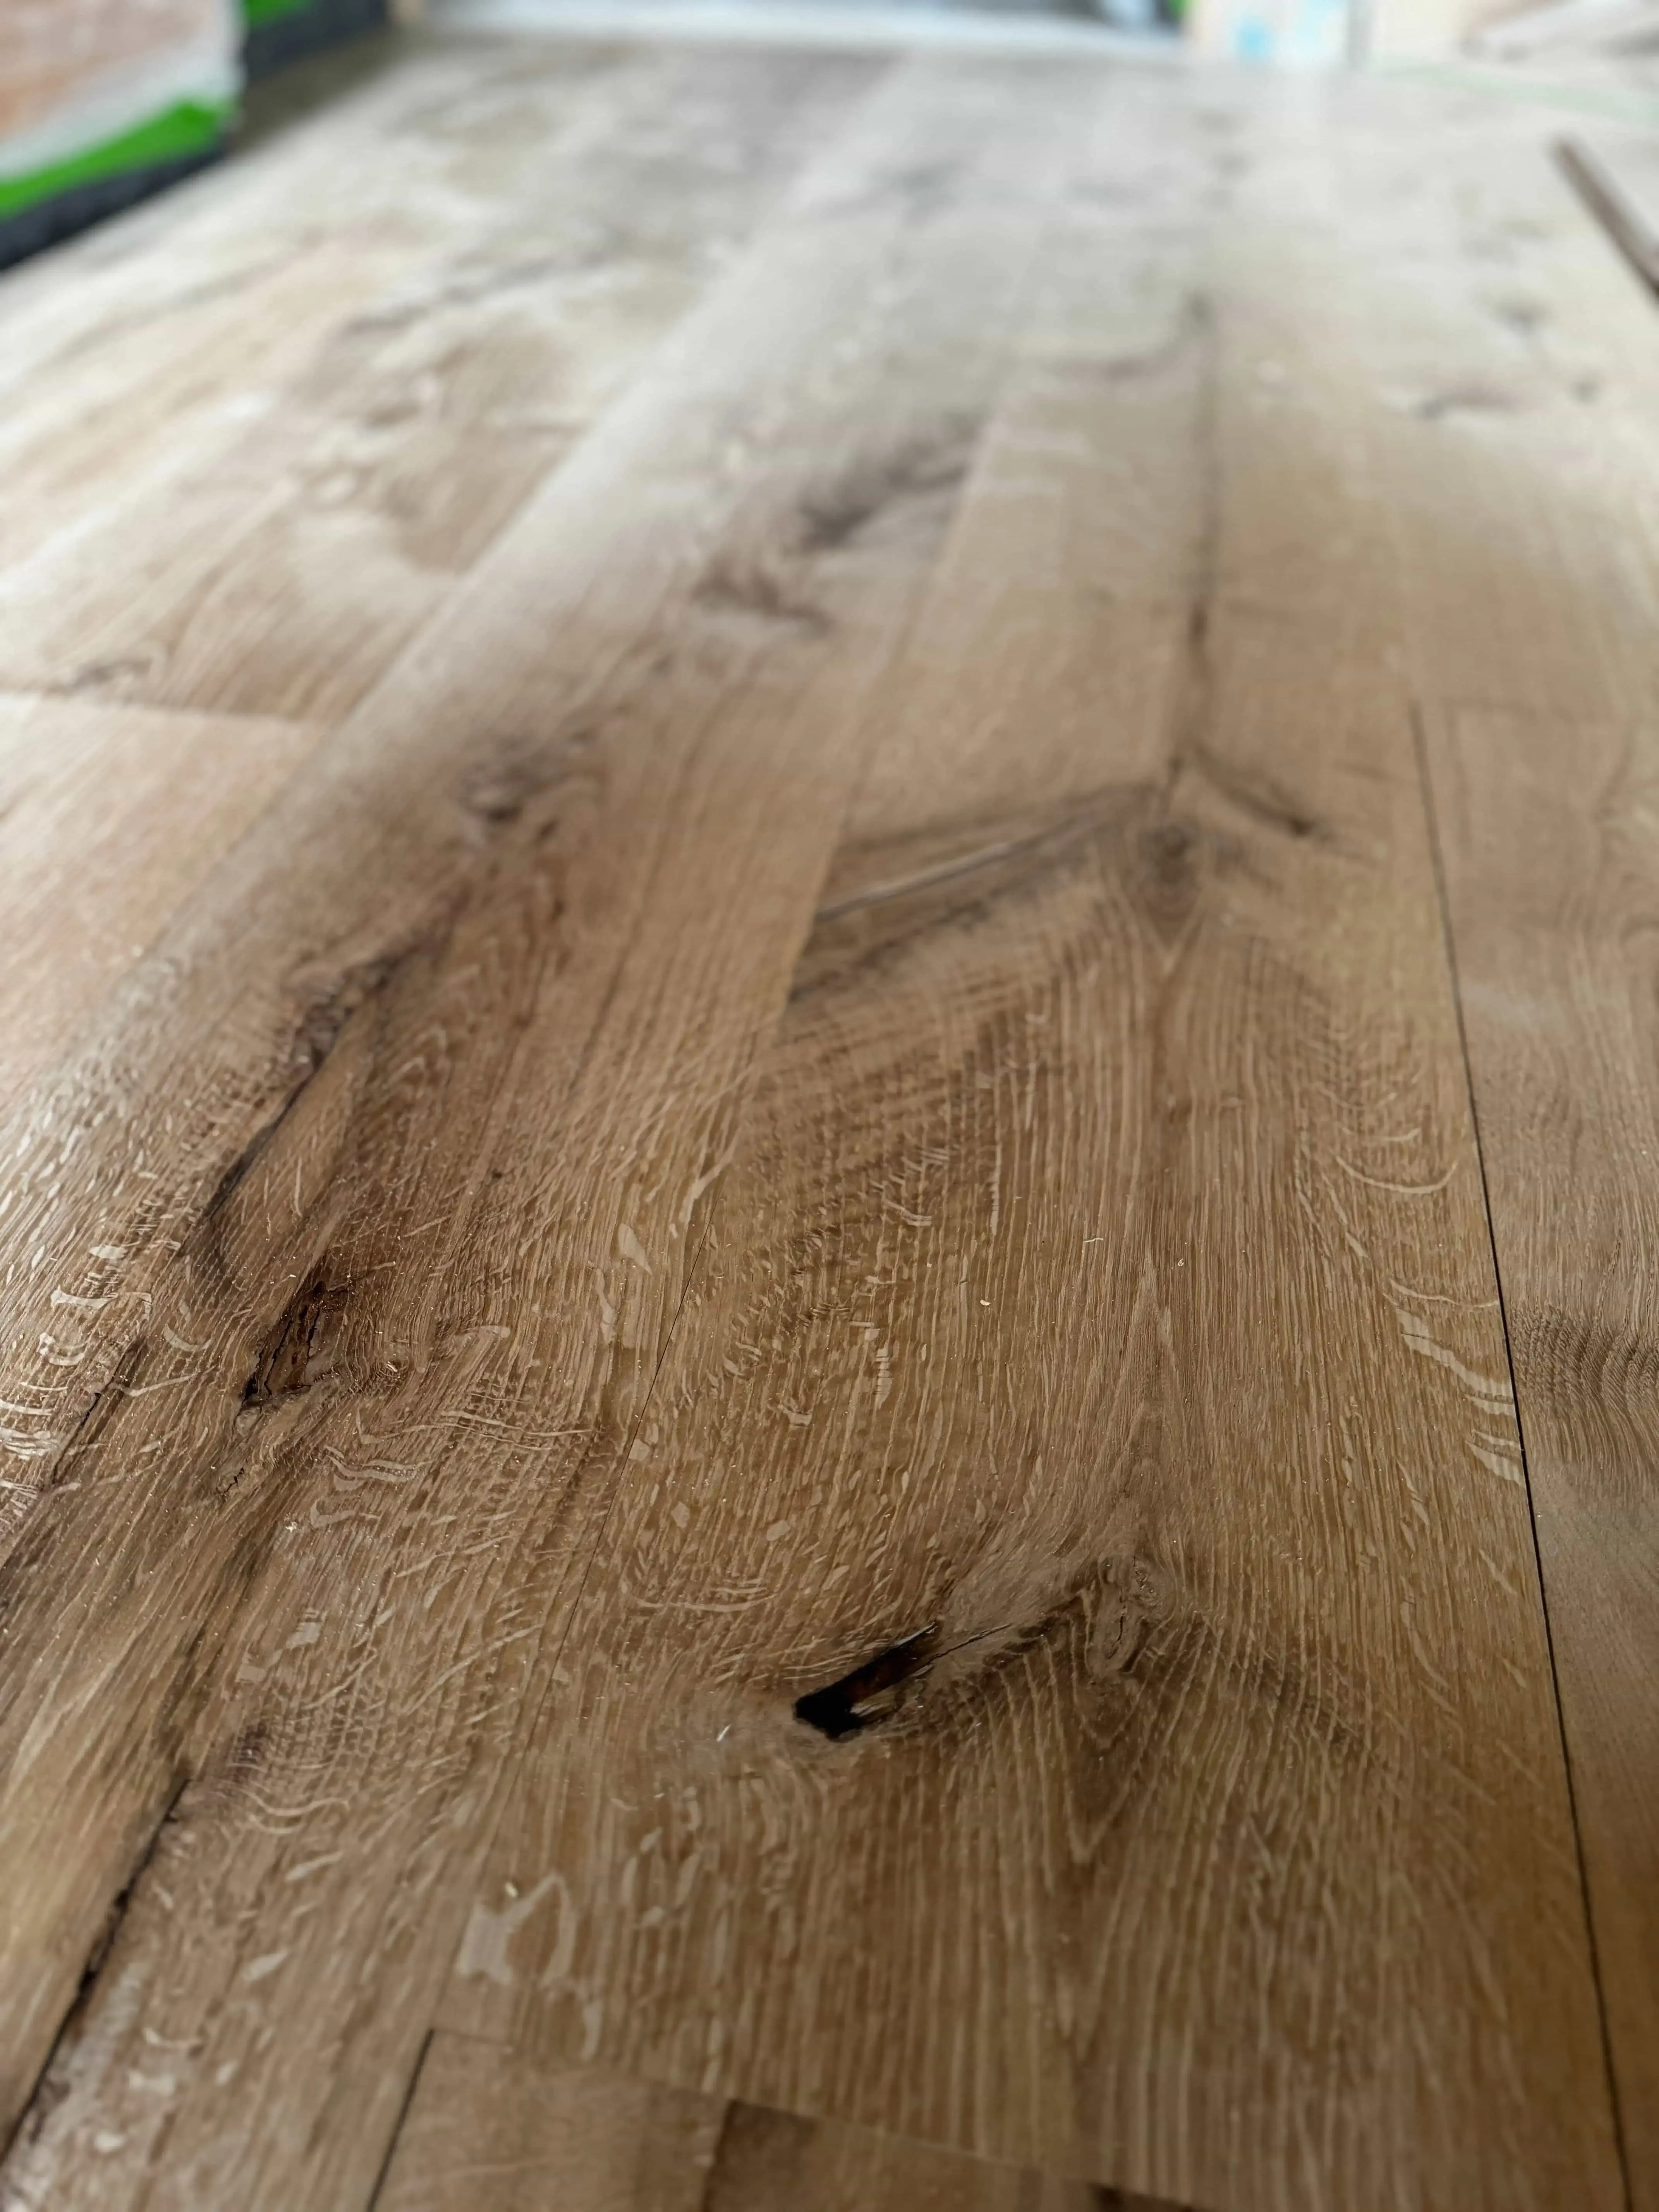
The choice of wood cut also played a significant role. Live-sawn wood floors are distinctive in the way the flooring is cut - straight through the log - resulting in three different cuts in one: plain sawn, rift sawn, and quarter sawn. The wider plank floor allowed the beauty of the live-sawn wood to truly come to life.
Post-Installation Phase
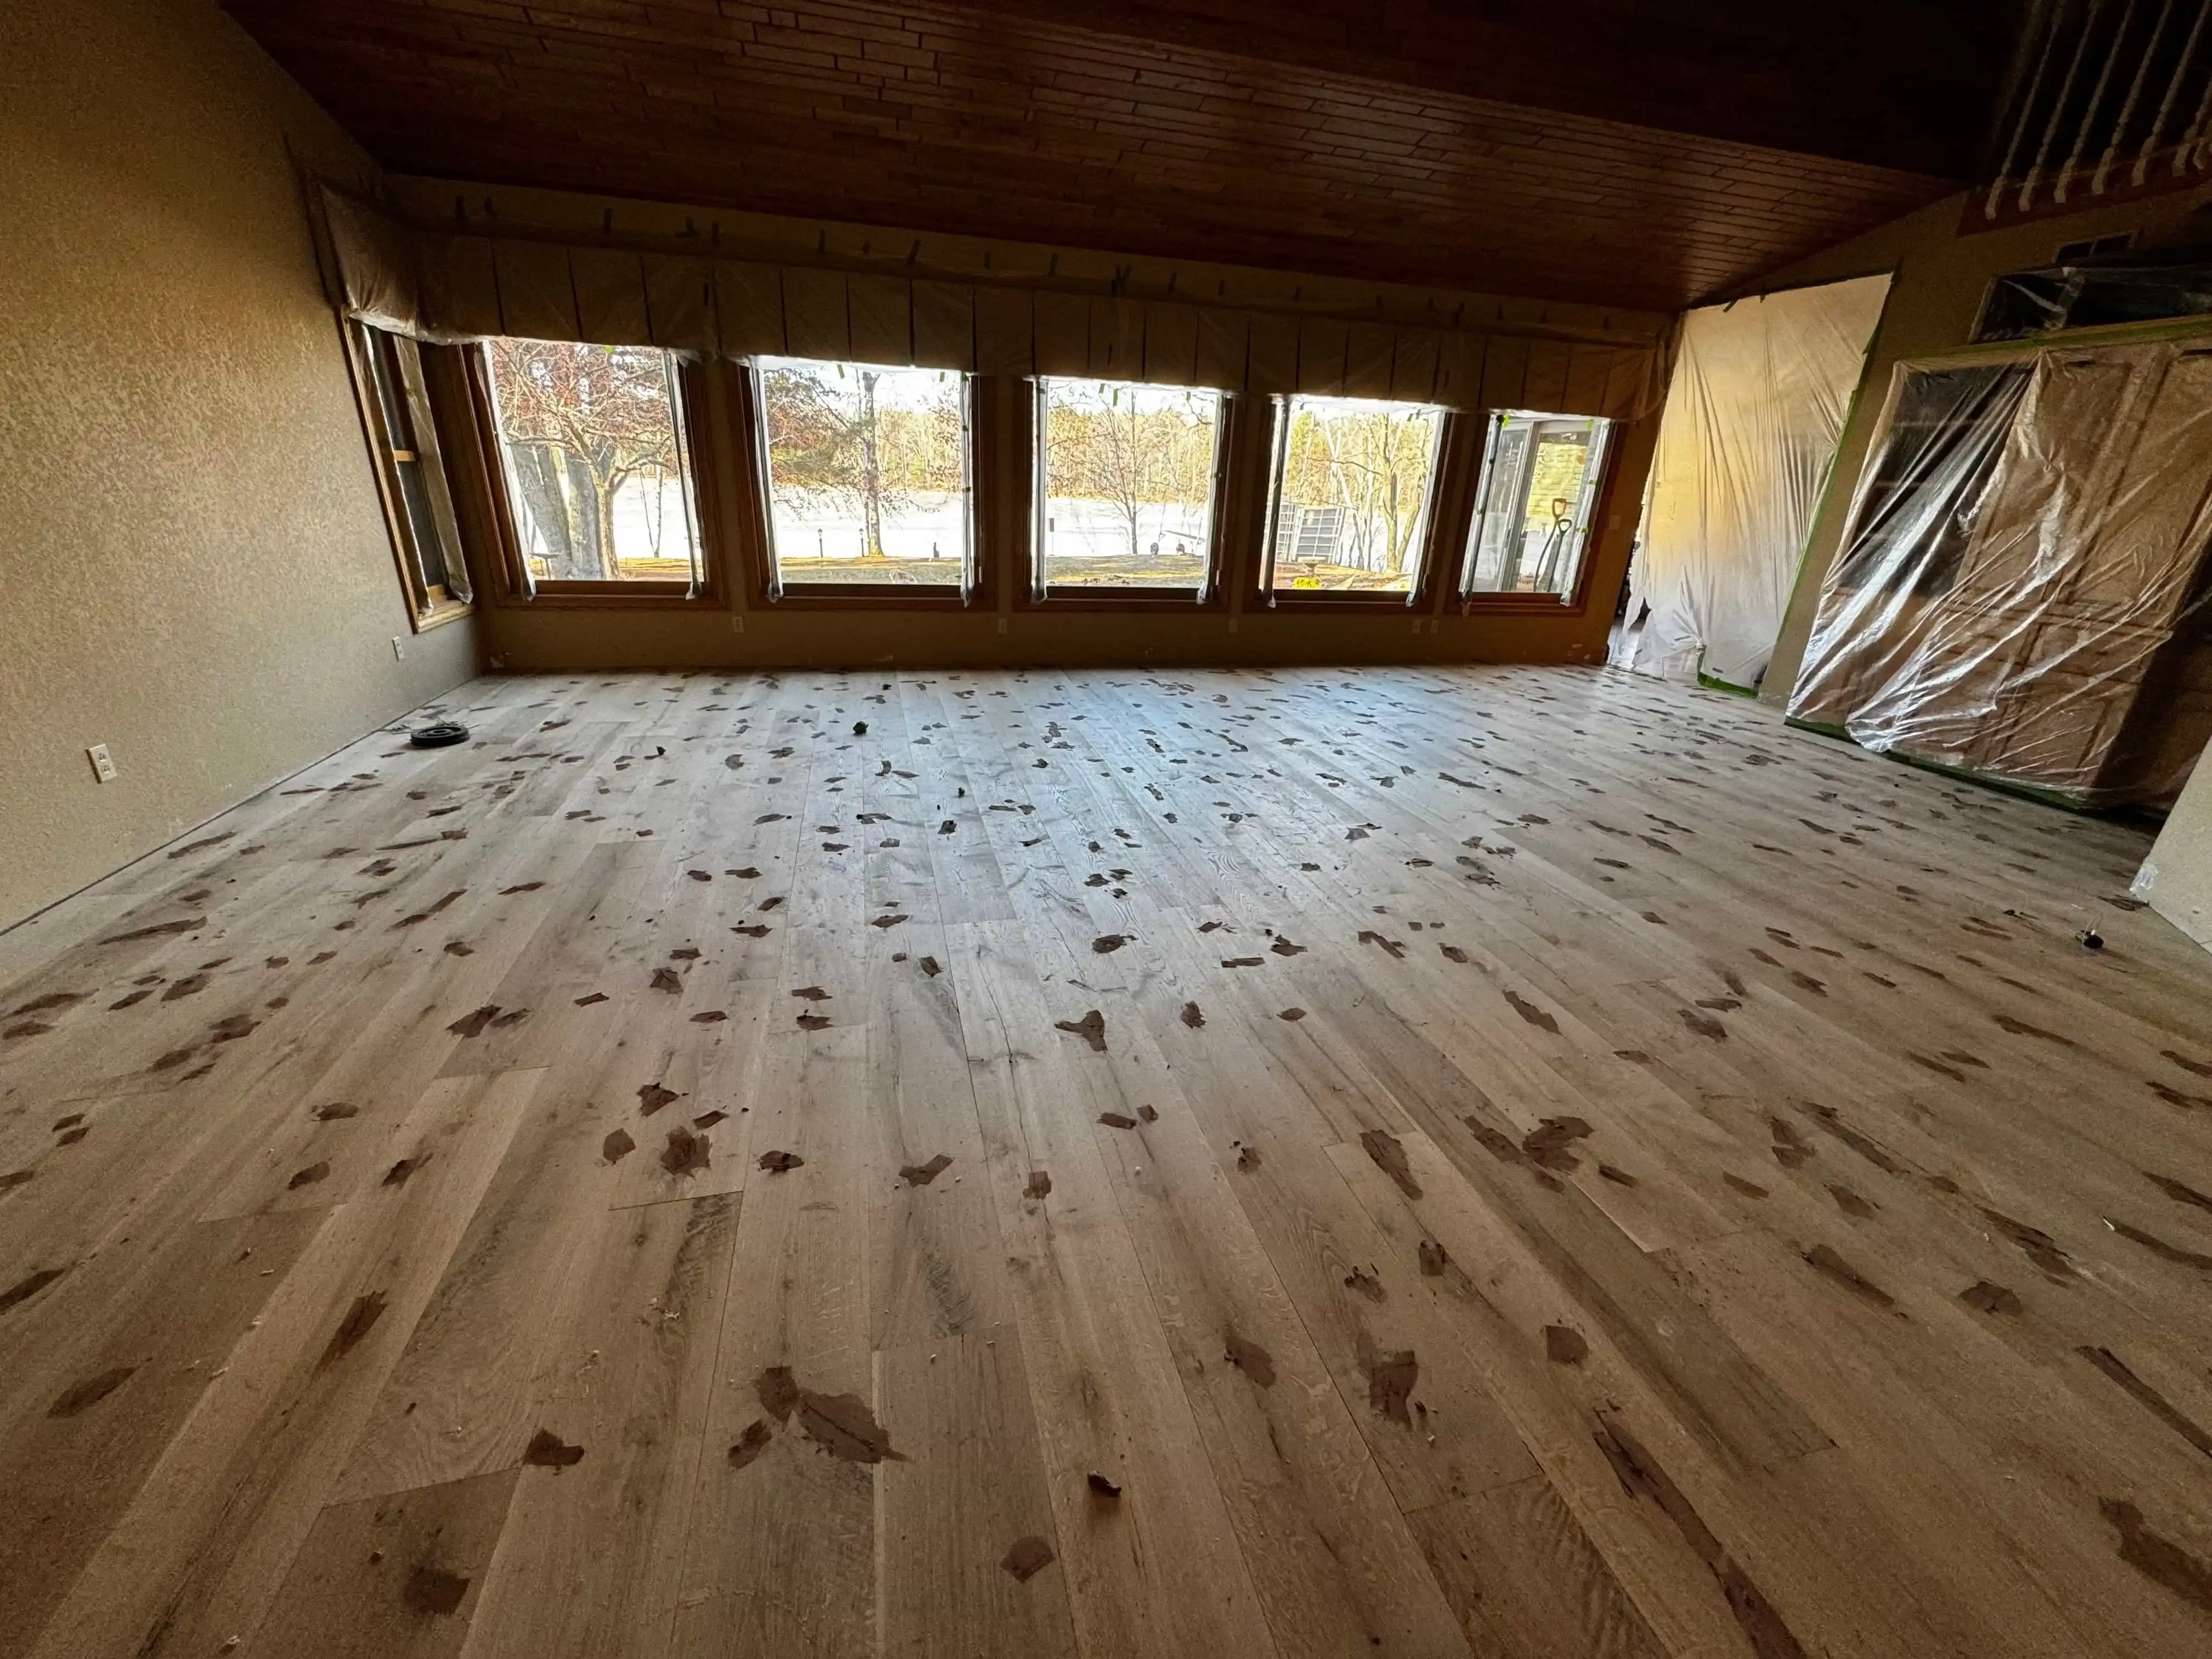
Even though the floor was engineered and structurally stable, it was essential to ensure that the wood properly acclimated to the space, particularly due to the in-floor heating. Once the engineered wood floor had acclimated for a few weeks and reached an equilibrium with the cement sub-straight, we could begin preparing for the installation of the new wood floors.
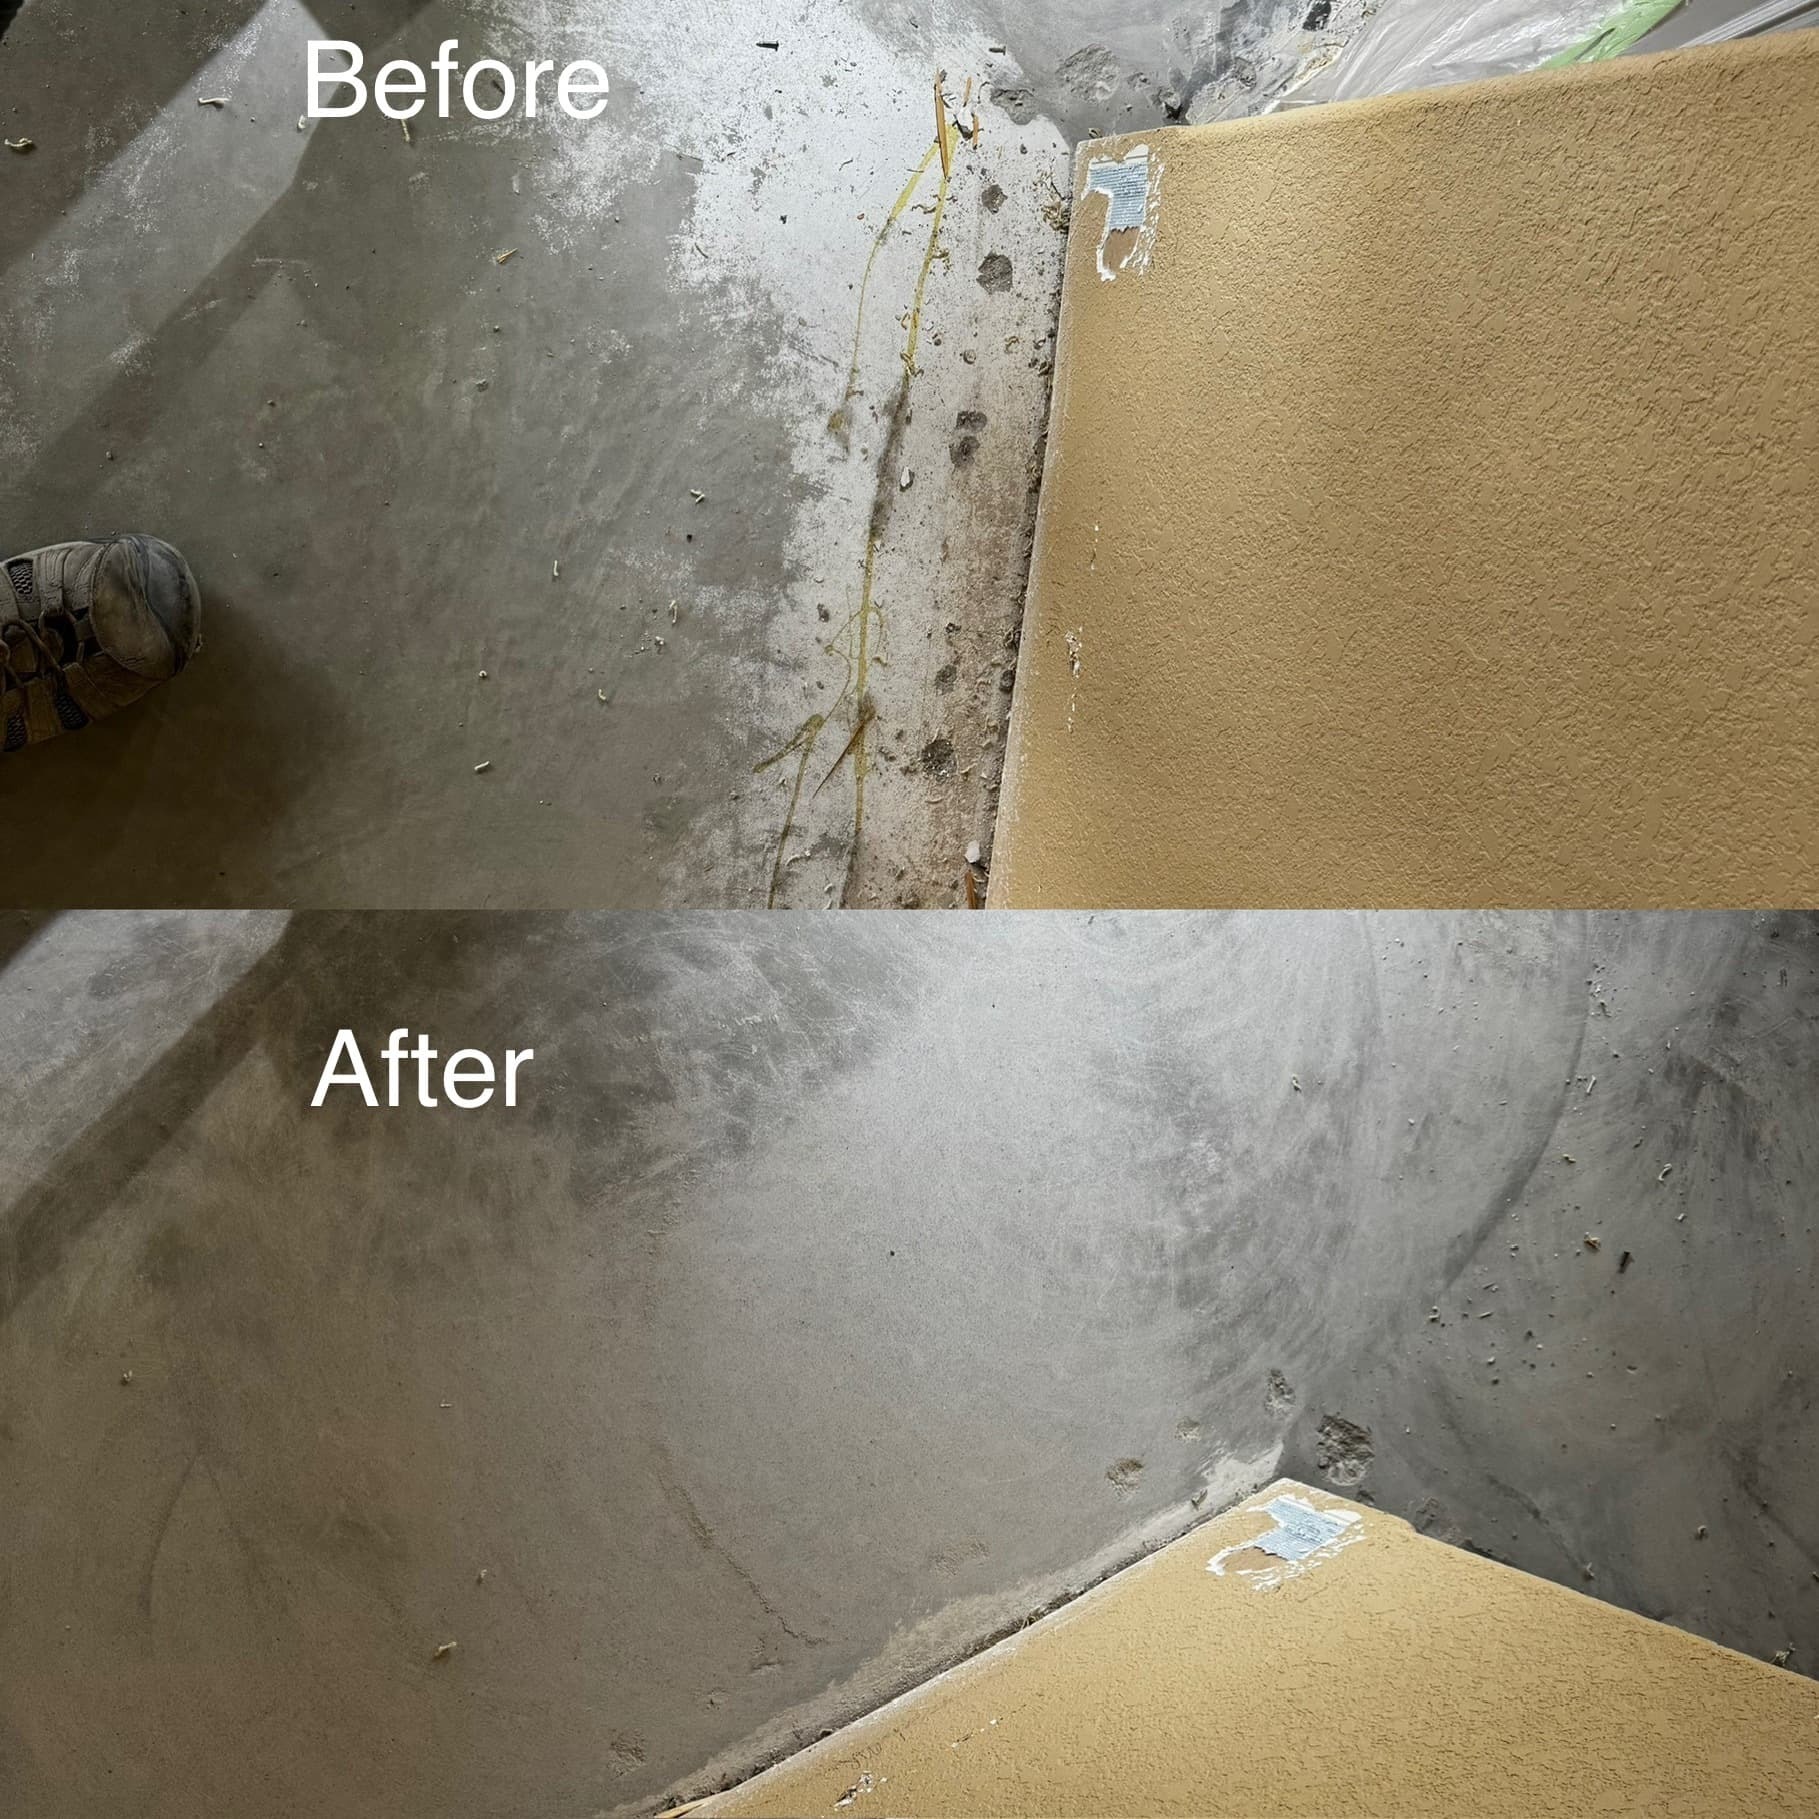
Concrete floor preparation differs from that of a wood subfloor. When gluing directly to concrete, the flatness tolerance shrinks. We had to ensure a ⅛” flatness in a 6’ radius (or 3/16” in a 10’ radius), in adherence to guidelines set by the NWFA (National Wood Flooring Association). After confirming the relative flatness of the concrete, we conducted moisture testing and applied 2 coats of Bona 540 moisture barrier to ensure the stability of the floor for years to come.
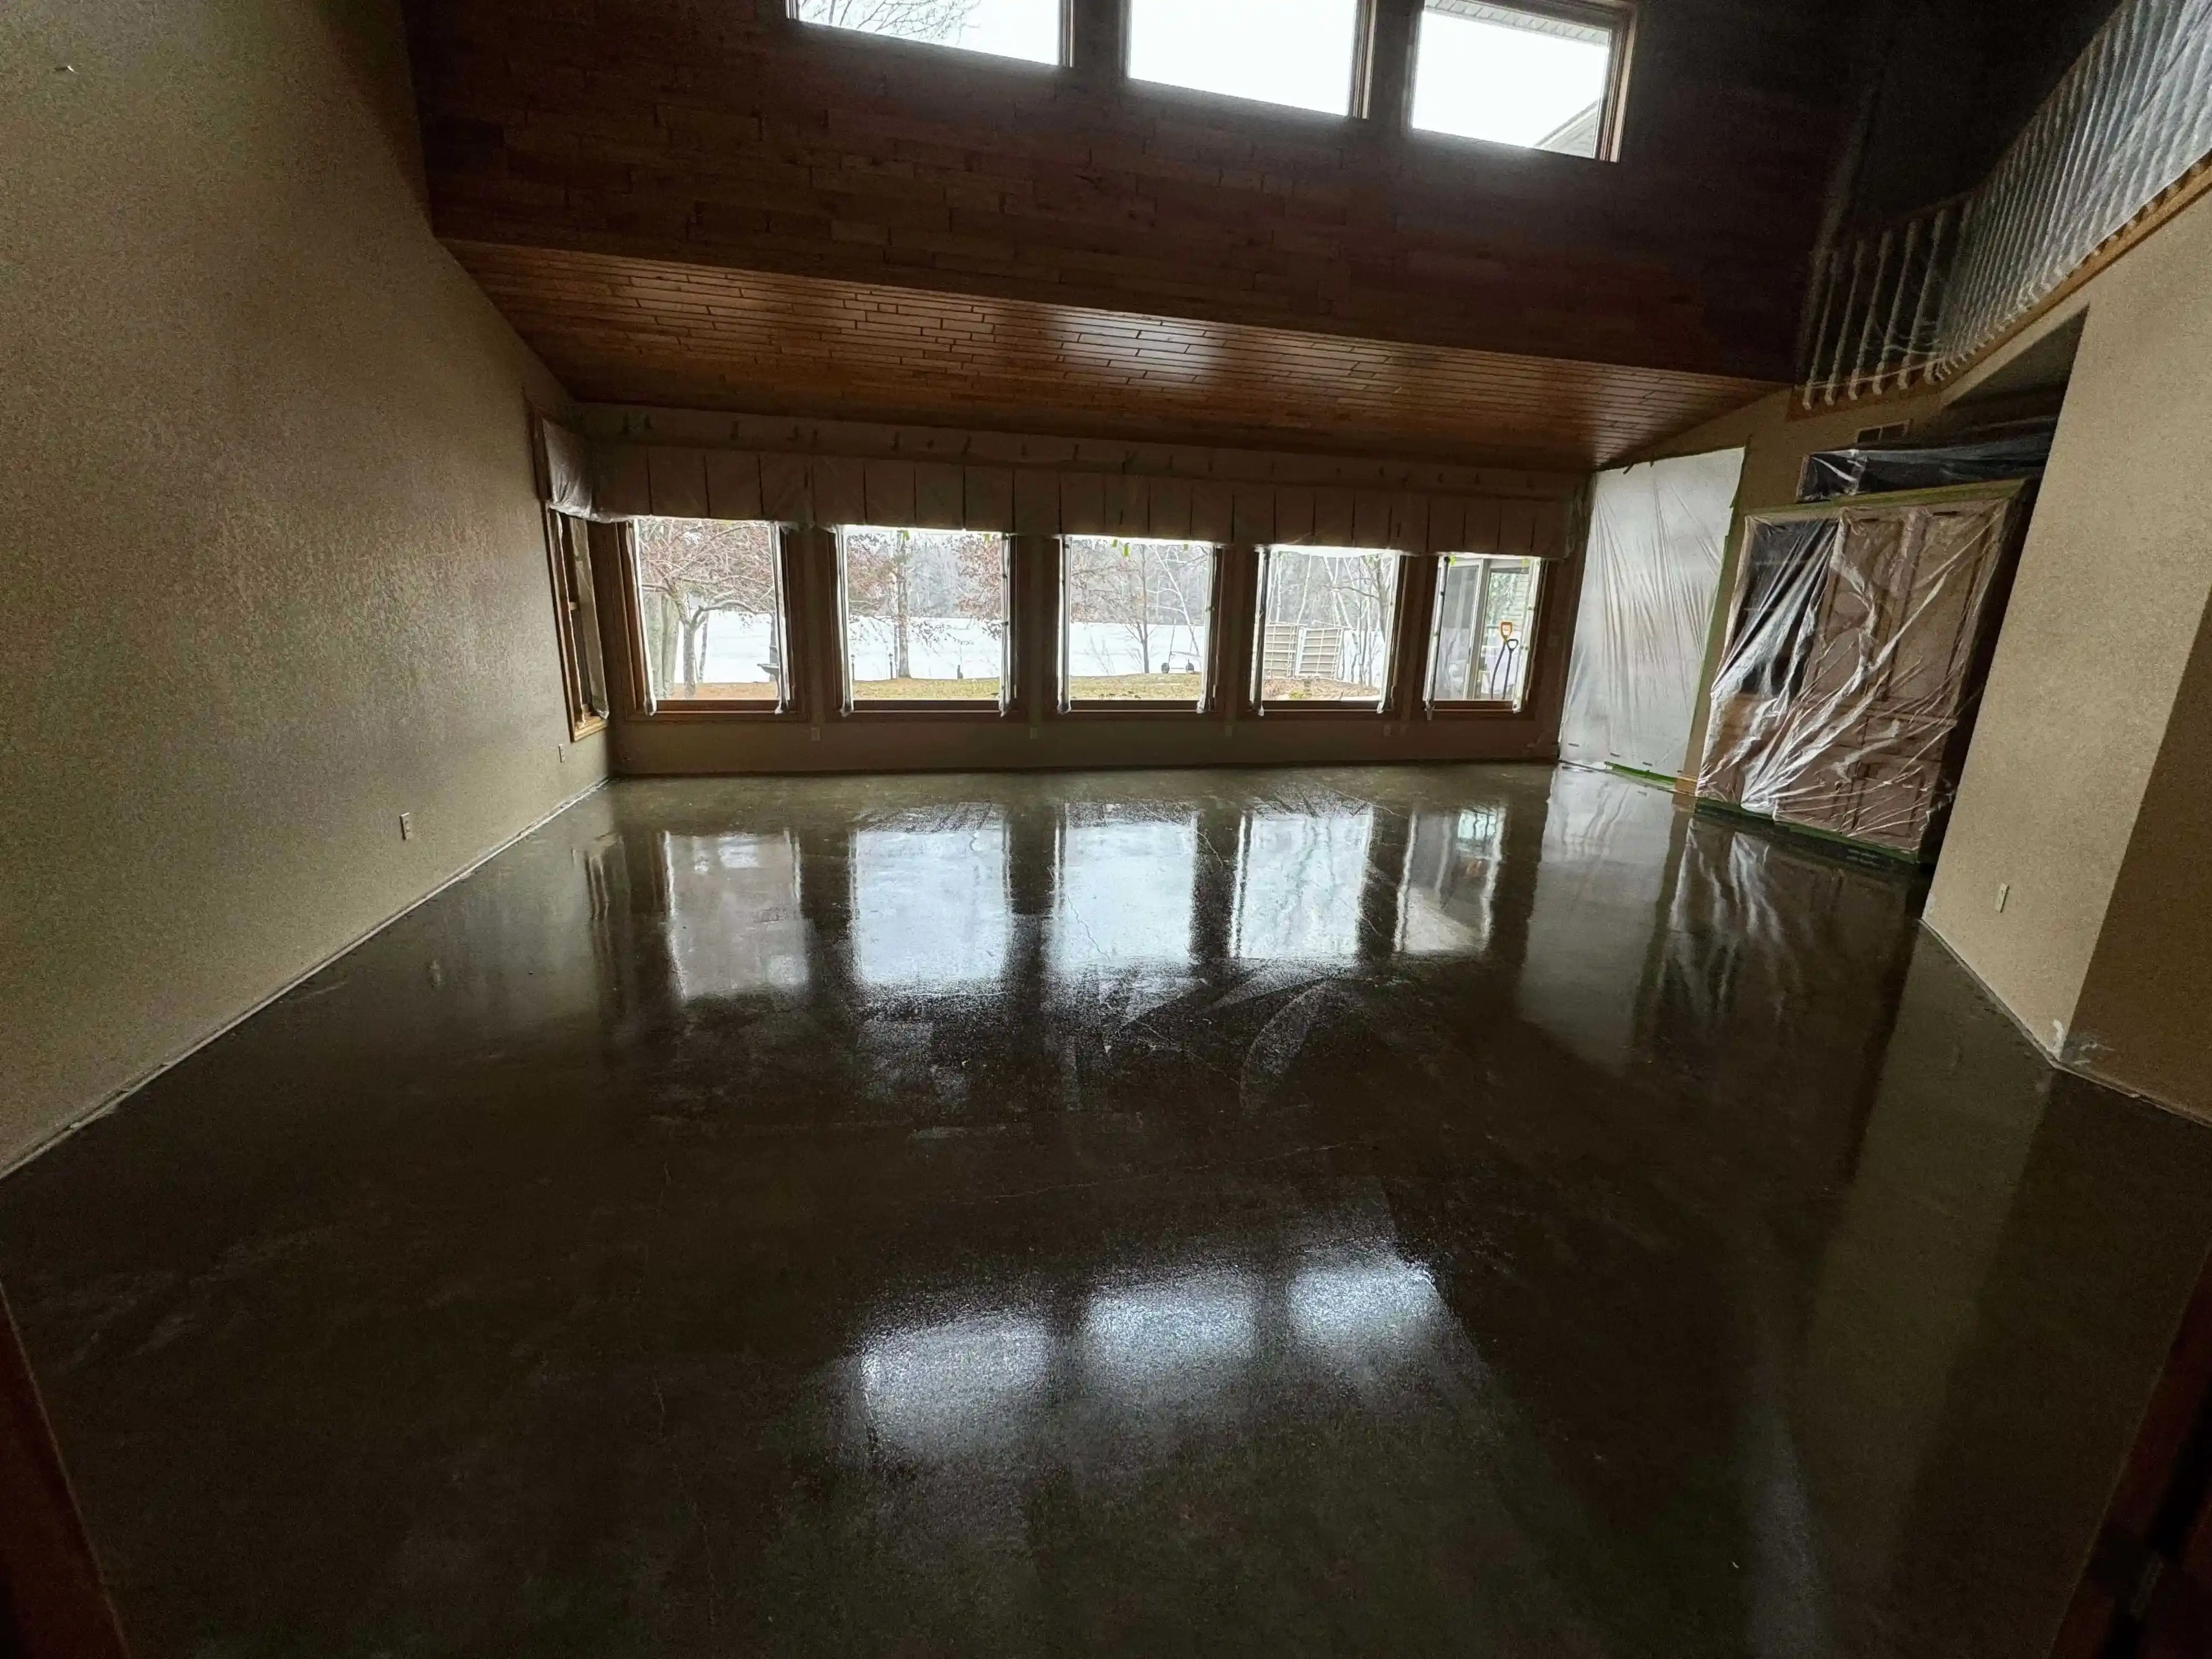
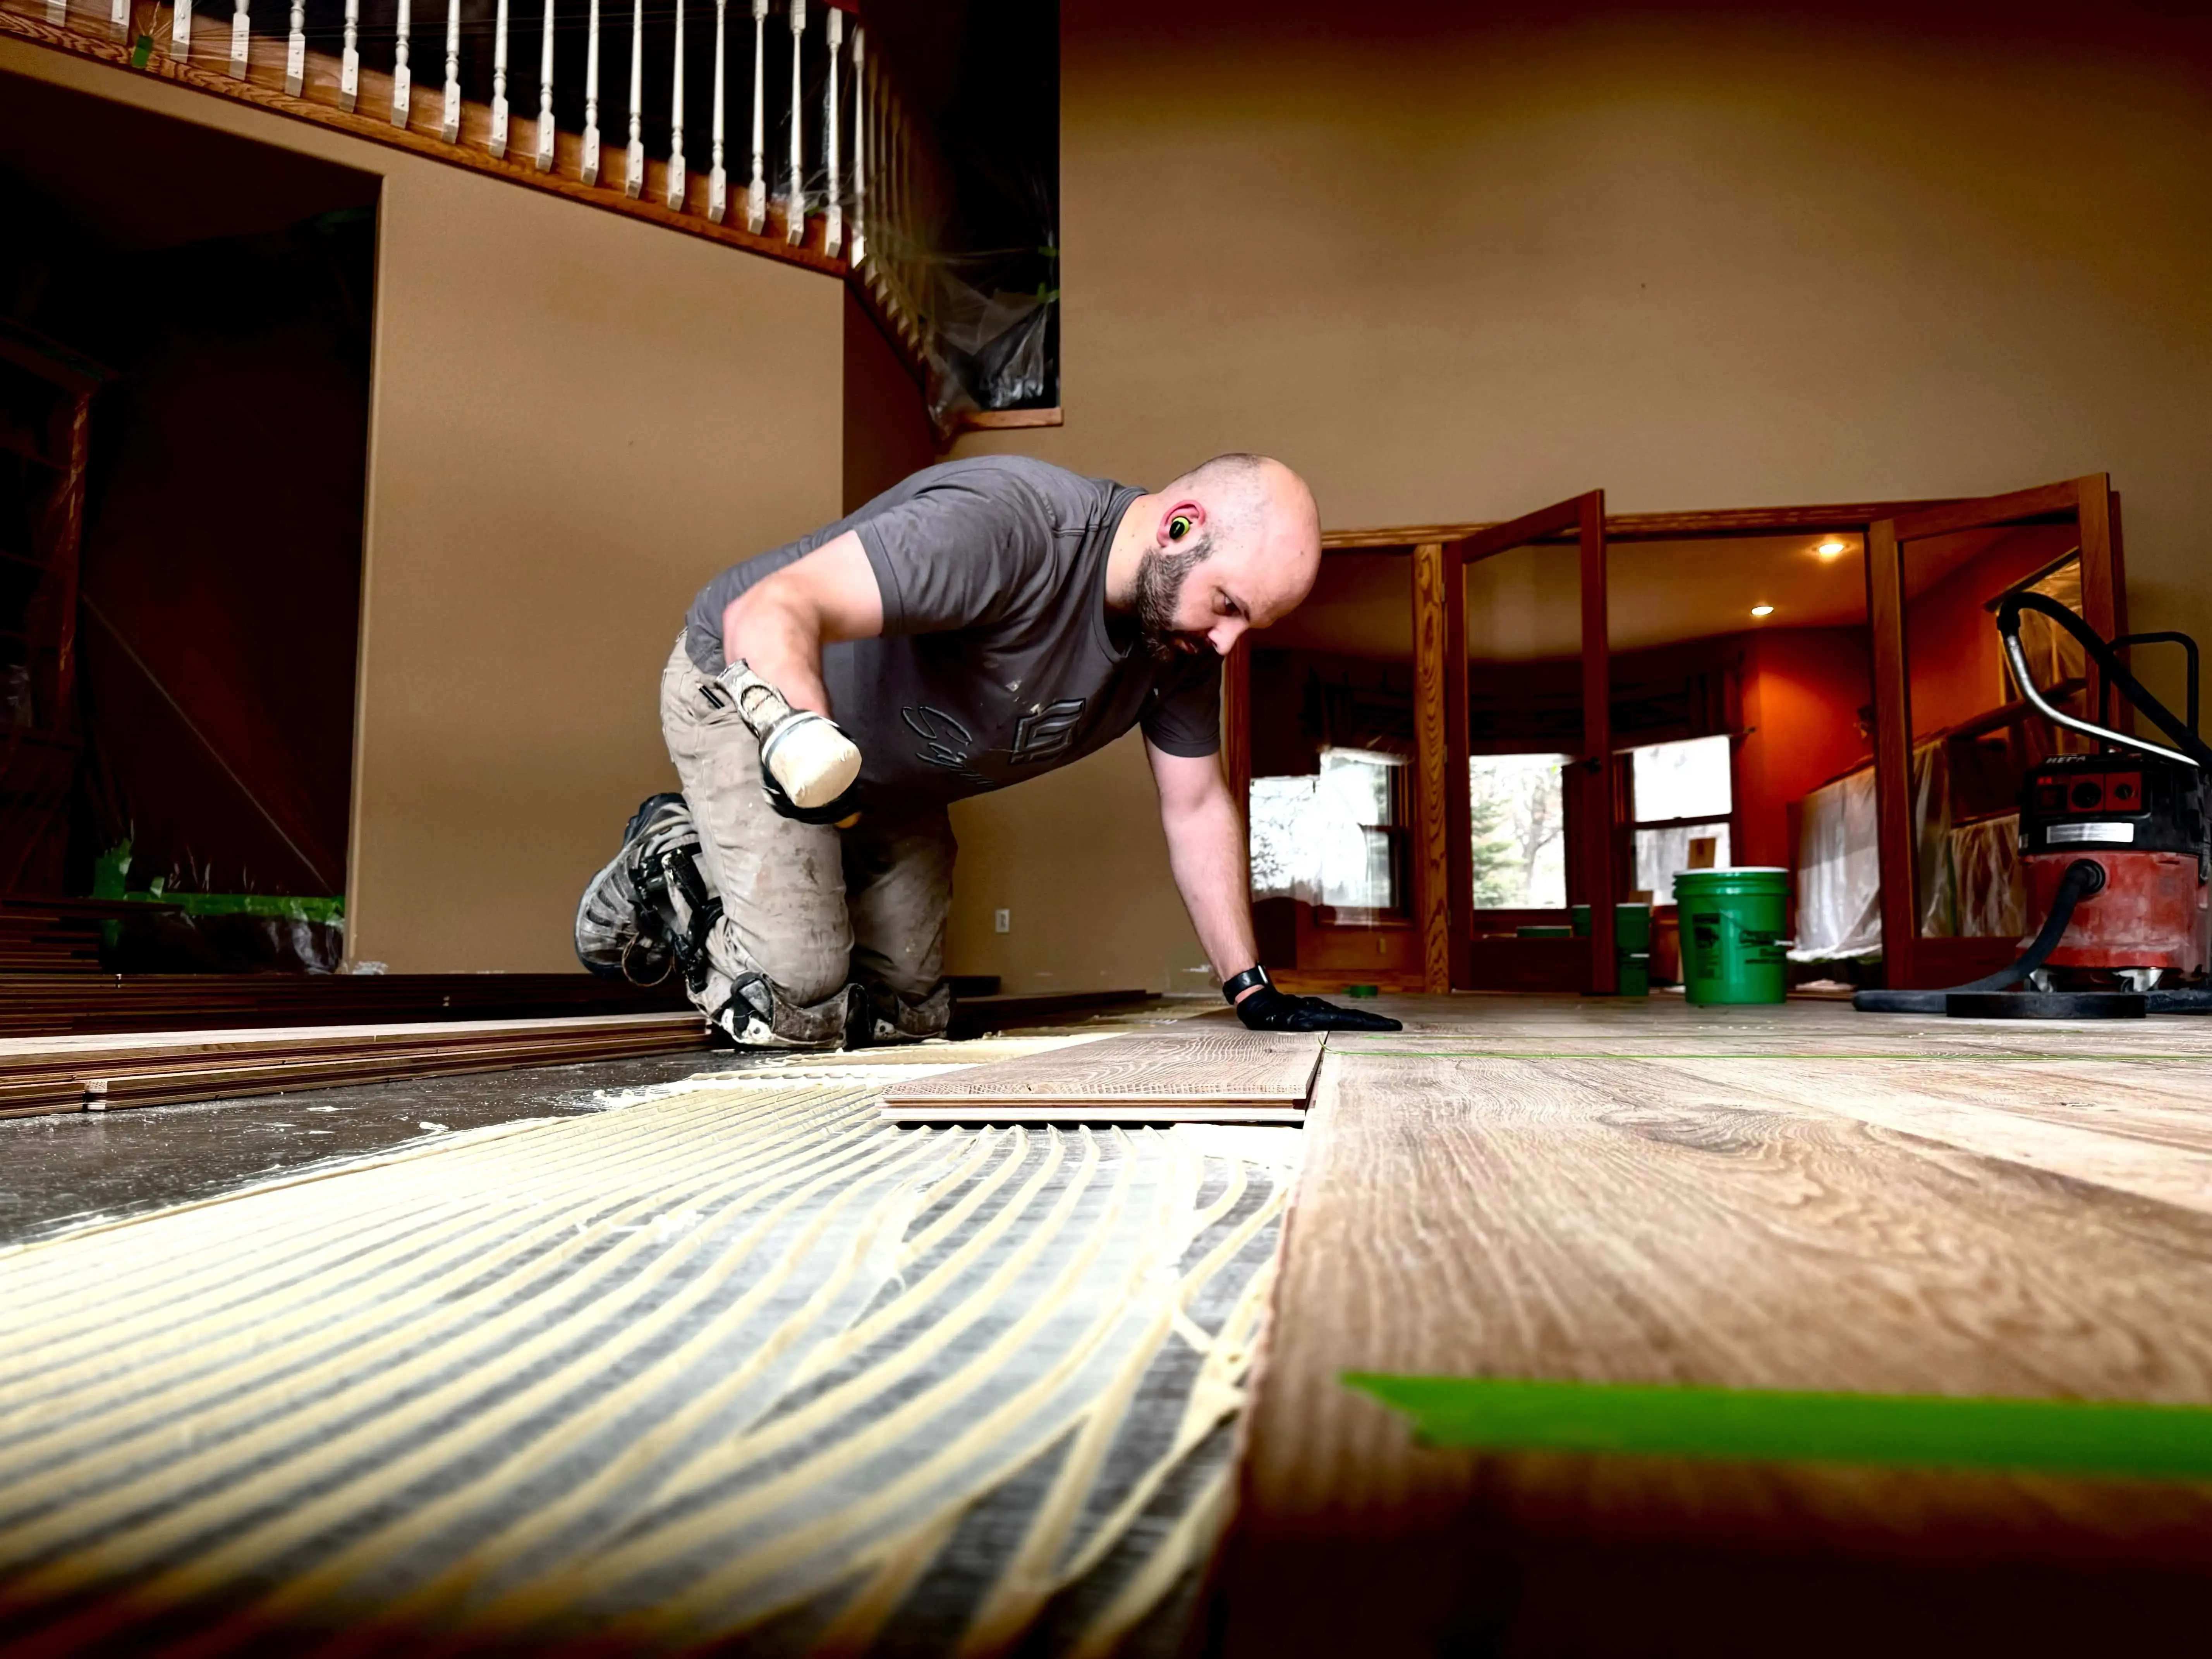
Subsequently, I embarked on the installation process, meticulously laying out the wide plank flooring and ensuring precise placement with the use of blocks and careful troweling of the glue. The installation was followed by a 24-hour wait period before commencing the sanding process, all the while relishing the warmth from the heated floor during installation on a cold January day.
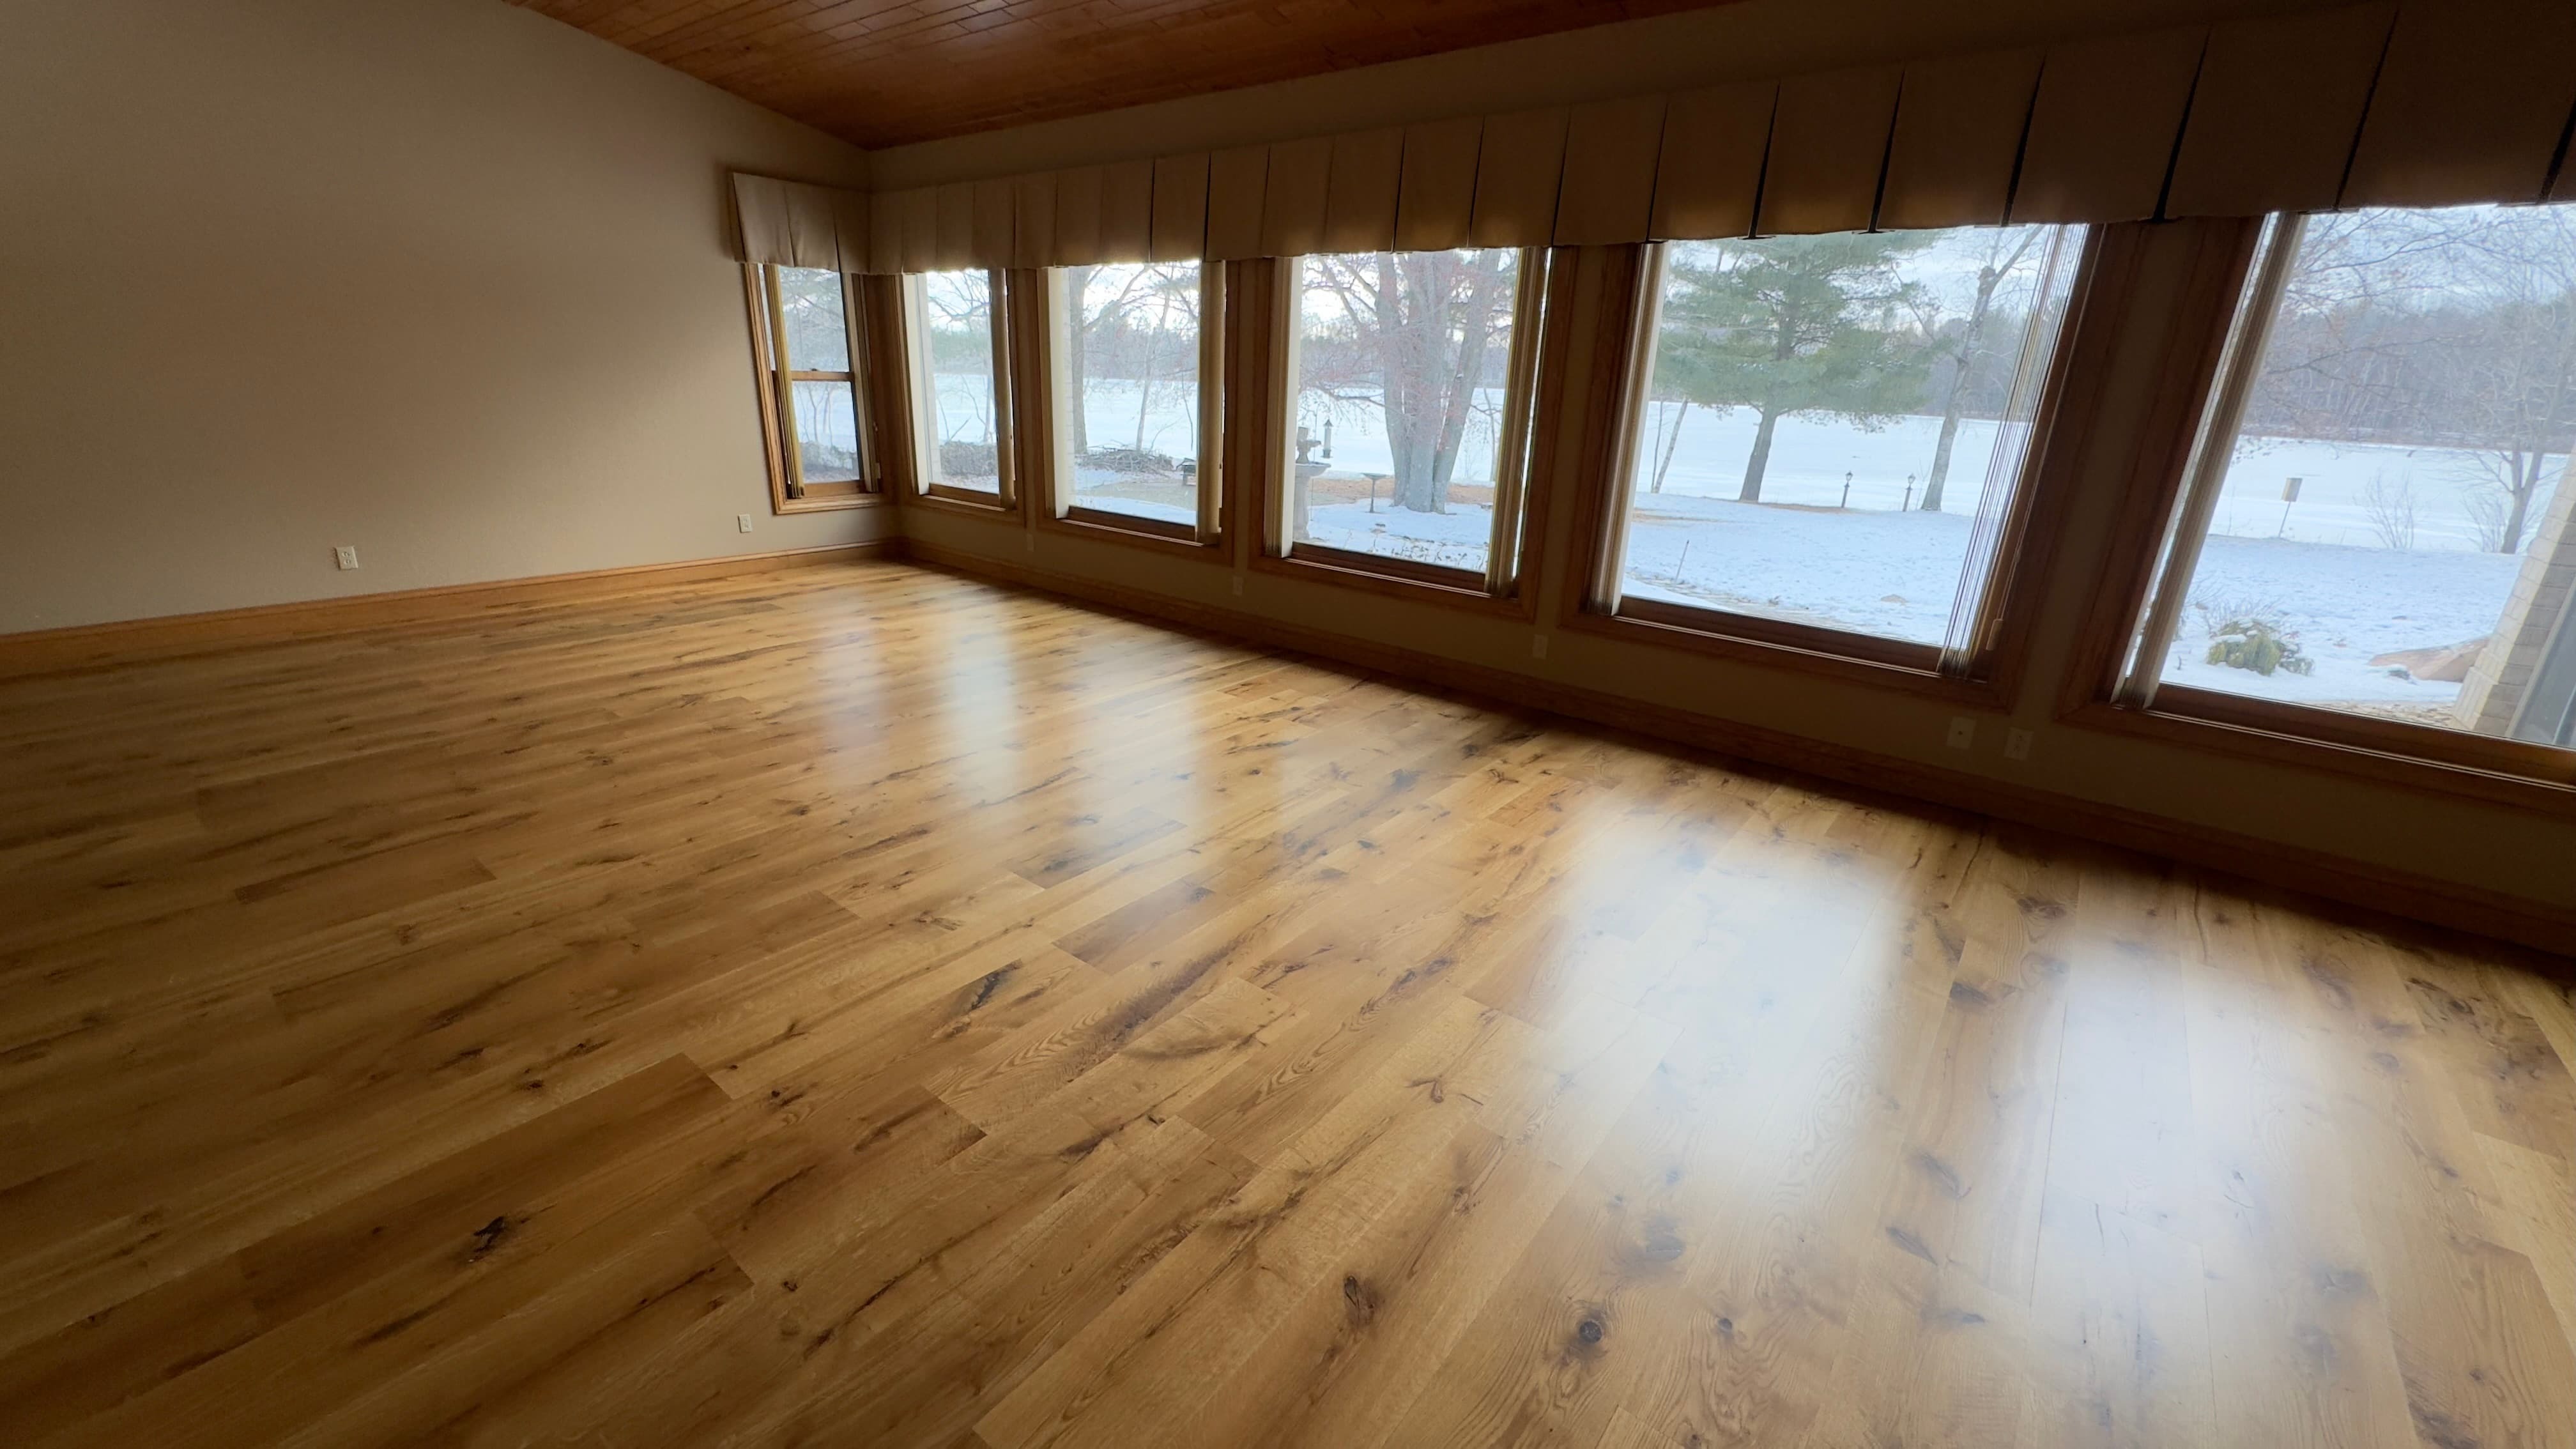
The post-installation phase involved filling any knots in the wood with a special filler, sanding the floor, and applying a sealer, followed by a commercial-grade wood floor finish.
The meticulous process of finishing the floor was vital to achieving the desired outcome. The end result speaks for itself - the wide plank white oak flooring has brought a remarkable transformation to the space, far surpassing the previous carpeting. The enduring appeal of wood floors adds not only style but also value to the home.
If you have a space that needs to be transformed, reach out to me!