Why You Should Hire a Pro to Refinish Your Wood Floors
Posted by Aaron Schaalma
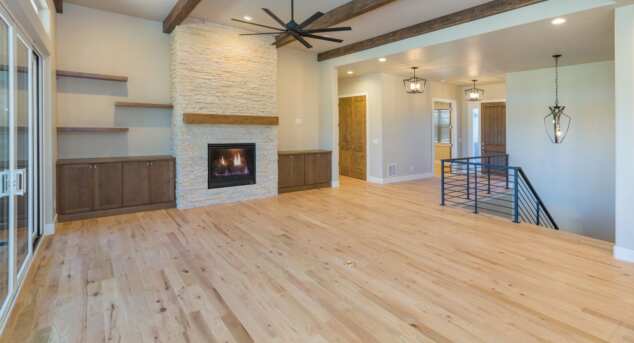
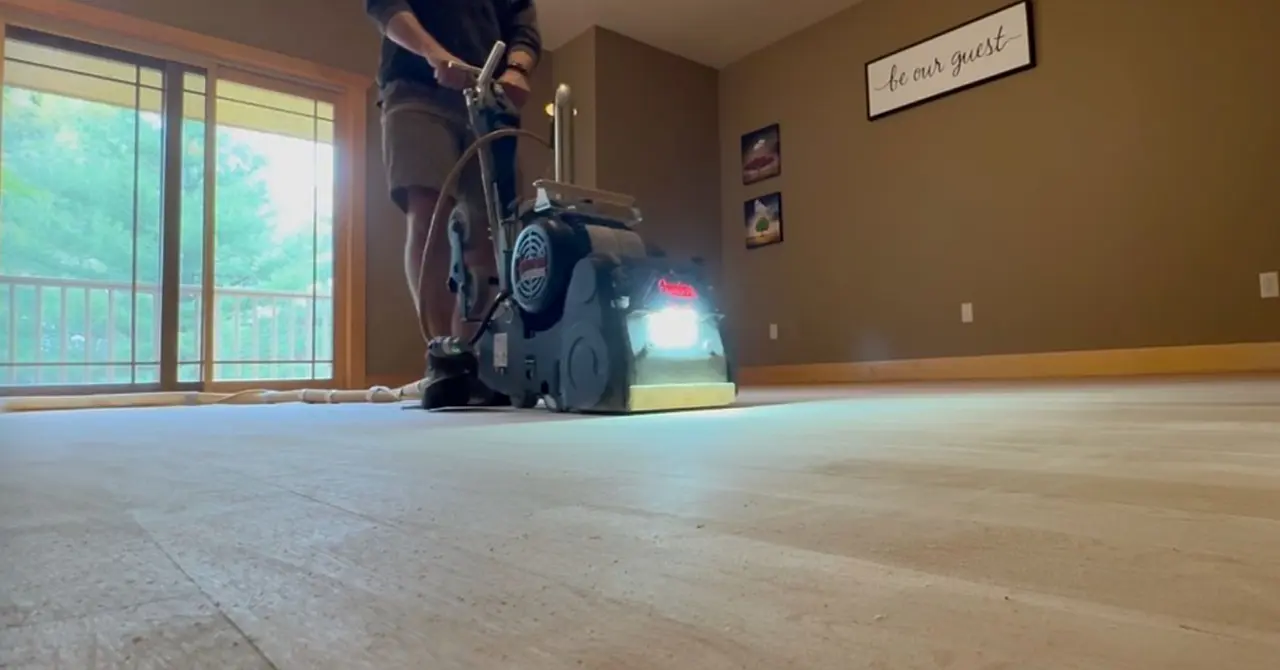
Professional hardwood floor sanding is the foundation of a beautiful, long-lasting finish.
Refinishing hardwood floors can transform a room faster than almost any other home improvement project. Dull boards regain depth. Scratches soften or disappear. Faded color becomes warm and even again.
When done well, wood floor refinishing can make an older home feel cleaner, brighter, and more valuable without replacing the flooring you already have.
However, the phrase “refinishing hardwood floors” can make the job sound more simple than it is. Sand the floor, apply stain, add finish, and you’re done, right?
In reality, a professional-looking result depends on the condition of the wood, the right sanding sequence, careful dust control, proper stain application, compatible finishes, and a smooth curing process. One mistake can leave swirl marks, blotchy color, cloudy finish, uneven sheen, or even permanent damage to the boards.
That’s why hiring a professional is often the smartest choice, especially if your floors are valuable, older, heavily worn, or located in the main living areas of your home.
What hardwood floor refinishing really involves
Professional hardwood floor restoration is more than a cosmetic touch-up. It is a multi-step process designed to remove surface damage, prepare raw wood correctly, and protect the floor with a durable finish.
A typical refinishing project may include:
- Inspecting the floor for loose boards, deep gouges, stains, cupping, gaps, and previous finish problems
- Determining whether the floor has enough usable wood left to sand safely
- Removing furniture, shoe molding, vents, and other obstacles as needed
- Sanding with multiple grits to remove the old coating and level the surface
- Edging along walls, corners, stairs, and tight areas
- Filling small gaps, cracks, and nail holes where appropriate
- Buffing or screening to refine the scratch pattern
- Cleaning dust from the floor and surrounding surfaces
- Applying stain if a color change is desired
- Applying protective finish in controlled coats
- Allowing the finish to dry and cure properly before normal use
Each step affects the next. If the sanding is uneven, the stain can appear blotchy. If the dust is not managed, particles can dry into the finish. If the wrong finish is used over an incompatible stain or sealer, adhesion problems may appear later.
A professional brings not only equipment, but judgment. That judgment is often what separates a beautiful floor from a frustrating DIY redo.
Professionals know how to evaluate your floors first
Not every wood floor should be treated the same way. Before beginning any hardwood floor restoration project, a pro will assess the floor’s construction, thickness, age, species, damage, and previous coatings.
This matters because solid hardwood, engineered hardwood, and older flooring all have different limitations. Solid hardwood can often be refinished multiple times, depending on how much material remains above the tongue-and-groove joint. Engineered hardwood may have only a thin veneer layer, which can limit or even prevent full sanding. Historic wood floors may need a lighter approach to preserve character and avoid over-sanding.
A professional can also identify issues that refinishing alone may not solve, such as:
- Pet stains that have penetrated deeply into the wood
- Water damage or dark staining near windows, doors, kitchens, or bathrooms
- Boards that are cracked, loose, warped, or splintering
- Previous sanding mistakes, such as waves or drum marks
- Contamination from wax, oil, silicone, or old cleaning products
- Finish failure caused by moisture, poor prep, or incompatible products
This evaluation helps set realistic expectations. In some cases, refinishing will make the floor look nearly new. In others, the best result is a beautifully restored floor that still shows some age and character. A reputable pro will help you understand the difference before work begins.
The right equipment makes a major difference

Professional sanding equipment and dust containment systems help produce flatter floors, cleaner homes, and better results.
DIY floor sanding machines available for rental can be useful for small or low-risk projects, but they are not always equal to professional equipment. Refinishing hardwood floors requires consistent sanding pressure, proper grit progression, strong dust collection, and specialized tools for edges and corners.
Professional crews typically use equipment designed for efficiency and precision, such as:
- Belt sanders or drum sanders for large open areas
- Edgers for perimeter sanding
- Detail sanders or scrapers for corners and tight spaces
- Buffers for final abrasion between coats
- Dust containment systems to reduce airborne particles
- High-quality vacuums and tack methods for surface preparation
The difference is not just speed. Better equipment, used correctly, can create a flatter, smoother surface. It can also reduce the risk of chatter marks, gouges, and uneven sanding patterns that become obvious after stain or finish is applied.
A floor that looks acceptable when bare may reveal every flaw once the light hits the finish. Professionals understand how to sand for the final result, not just for the current step.
Sanding mistakes can be expensive to fix
Sanding is the most unforgiving part of wood floor refinishing. Remove too little old finish, and the new finish may not bond properly. Remove too much wood, and you shorten the life of the floor. Hold the sander in one place too long, and you can create a dip or gouge that is difficult to hide.
Common DIY sanding problems include:
- Visible drum marks across the floor
- Uneven areas that look wavy in natural light
- Cross-grain scratches that show through stain
- Edges that are lower or higher than the center of the room
- Corners that remain darker because old finish was not fully removed
- Over-sanded areas where the wood becomes thin or fragile
Fixing these issues may require additional sanding, board replacement, or professional correction. In severe cases, a mistake can limit your options because too much wood has already been removed.
Hiring a pro reduces that risk. Experienced refinishers know how to move equipment smoothly, choose the right grit sequence, blend edges into the main field, and stop before the floor is overworked.
Staining hardwood floors takes skill
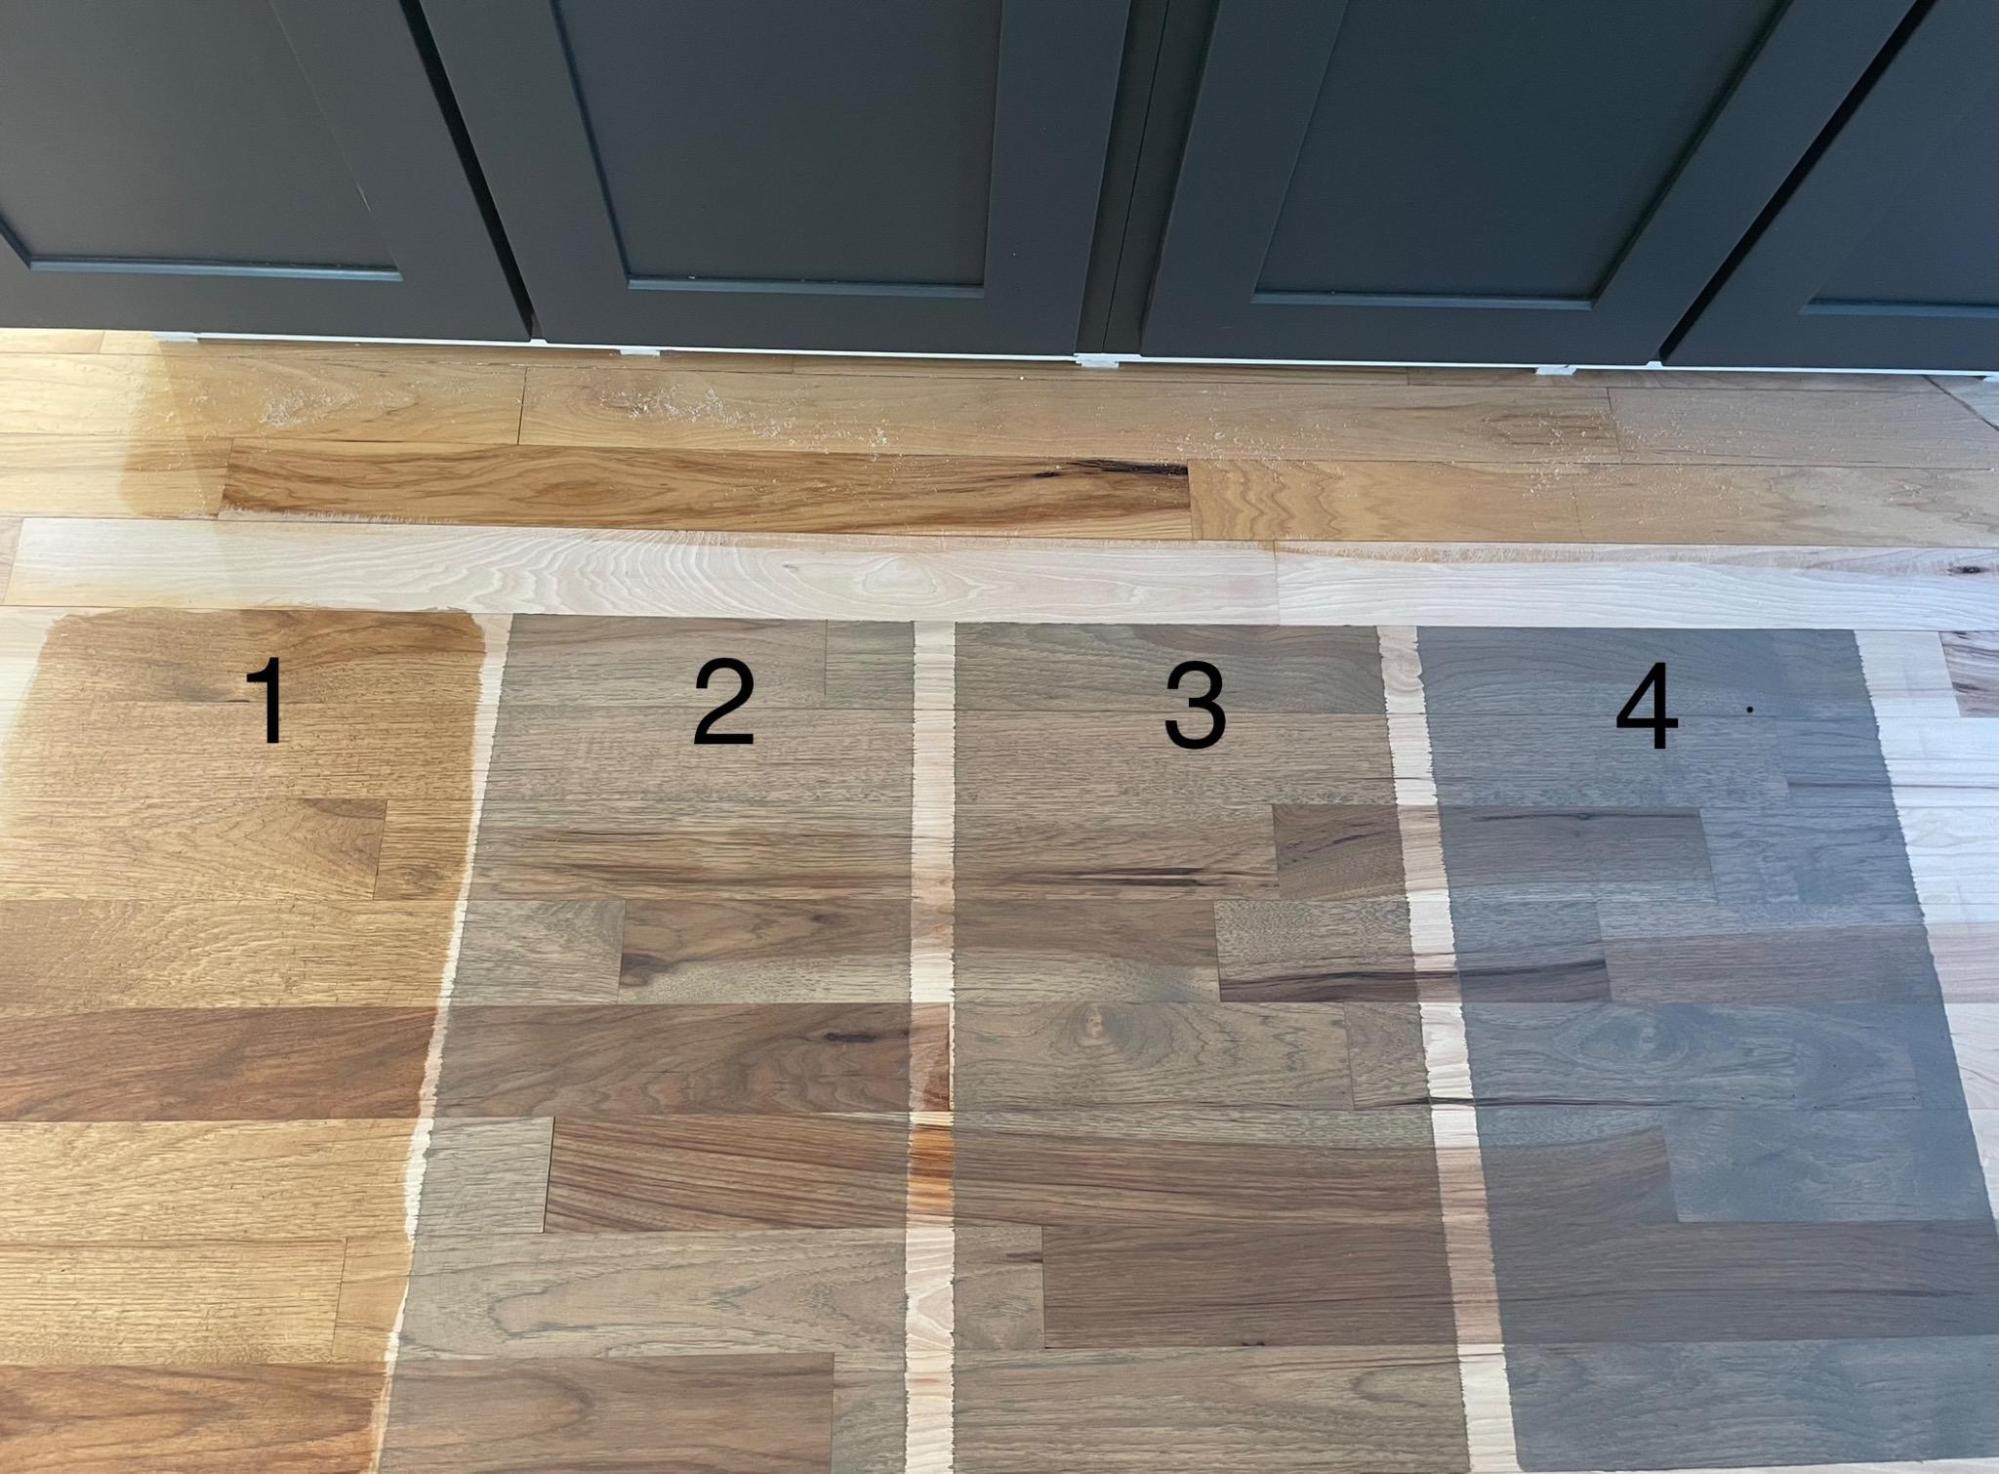
Testing stain samples on your actual floor lets you compare colors under your home's lighting before making a final decision.
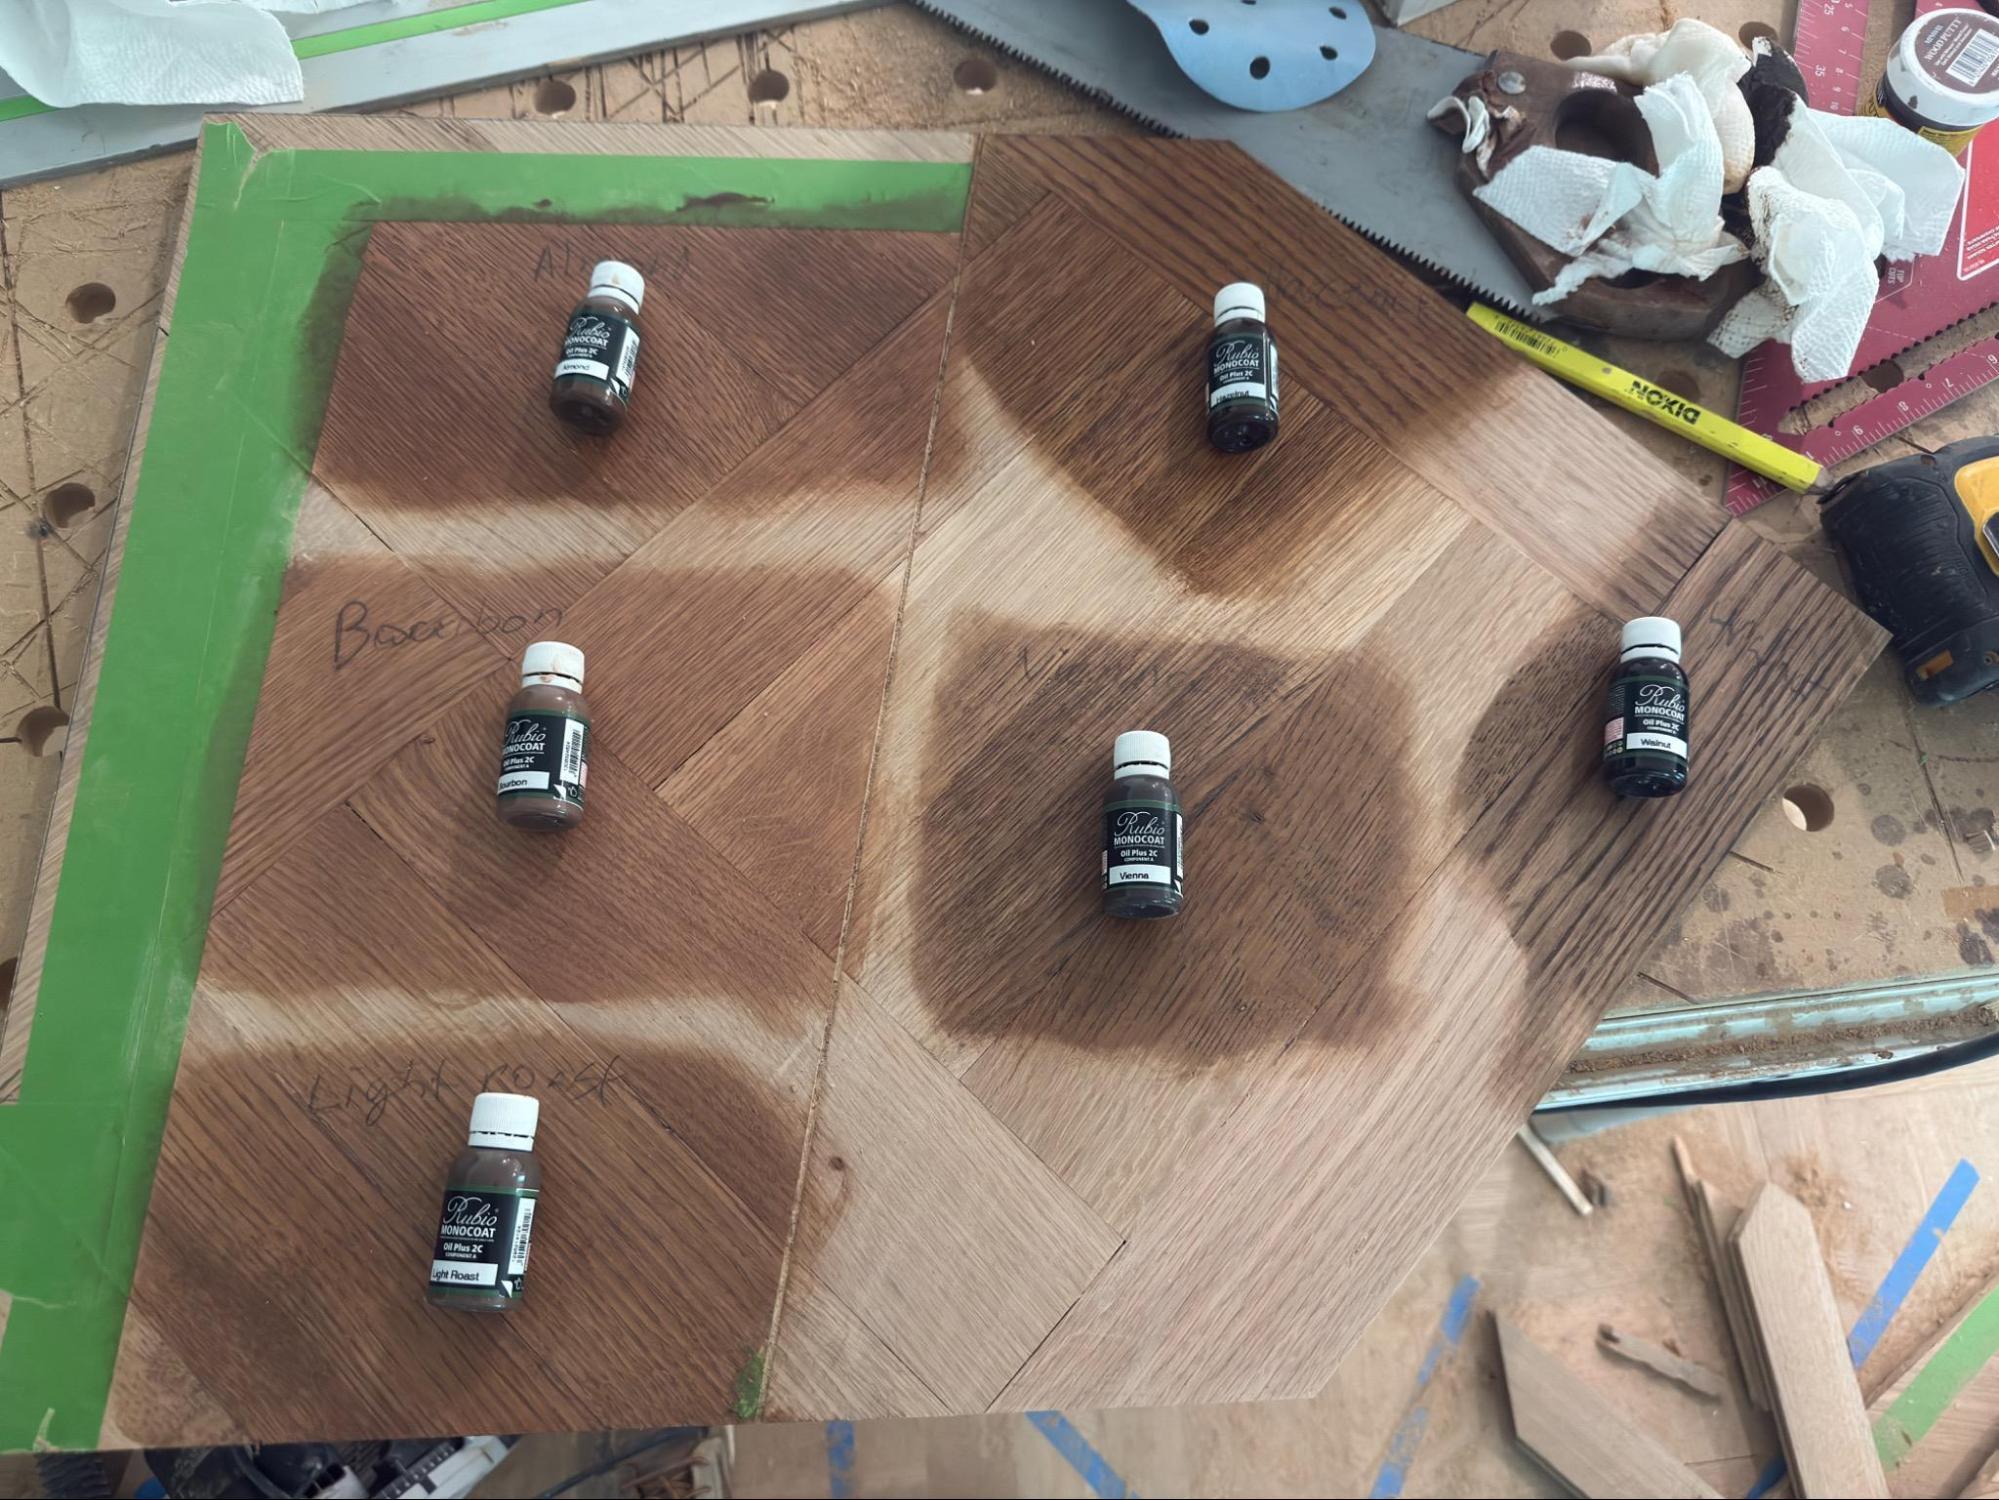
Custom sample boards allow homeowners to compare stain colors and finishes before making a final selection.
Many homeowners choose refinishing because they want to update the color of their floors. A lighter natural finish can make a space feel modern and airy. A medium brown can add warmth. A darker stain can create a dramatic, formal look.
However, stain is one of the areas where mistakes become highly visible. Different wood species absorb stain differently. Maple, pine, birch, and some other woods can blotch if not prepared properly. Oak tends to accept the stain more evenly, but sanding quality still affects the final color.
A professional can help with:
- Testing stain samples directly on your floor
- Explaining how lighting affects color perception
- Matching new areas to older floors when possible
- Using conditioners, sealers, or water-popping methods when appropriate
- Applying stain evenly across large rooms and transitions
- Avoiding lap marks, puddles, streaks, and uneven absorption
Color selection is also about long-term satisfaction. A pro can explain how certain colors show dust, pet hair, scratches, or traffic patterns. For example, very dark floors can look elegant, but they may reveal debris and surface marks more easily than mid-tone finishes. Very light floors can brighten a home, but they may not hide certain stains or wood variations.
Professional guidance helps you choose a finish that fits both your design goals and your daily lifestyle.
Finish selection affects durability and maintenance
The protective finish is what stands between your hardwood and everyday wear. Choosing the right one matters. Different finishes vary in appearance, drying time, odor, durability, maintenance requirements, and compatibility with your home.
Common options may include water-based polyurethane, oil-based polyurethane, hardwax oil, and other professional-grade systems. Each has advantages and tradeoffs.
A flooring professional can help you think through questions such as:
- Do you prefer a natural, matte, satin, semi-gloss, or glossy look?
- How much foot traffic does the floor receive?
- Do you have pets, children, or frequent guests?
- How quickly do you need to return to the space?
- Are odor or indoor air concerns important during the project?
- Do you want a finish that ambers over time or stays clearer?
- How much ongoing maintenance are you willing to do?
The best finish is not always the most expensive or the hardest. It is the one that fits the wood, the room, and the way you live. Professional refinishers work with these products regularly, so they can recommend a system that balances beauty, protection, and practicality.
Pros understand dust control and site protection
Wood floor refinishing creates dust. Even with modern equipment, proper containment and cleanup are essential. Dust can settle on walls, cabinets, countertops, vents, electronics, window treatments, and newly finished surfaces.
Professional crews typically take steps to reduce mess, such as sealing off work areas, using dust containment equipment, covering sensitive spaces, and cleaning thoroughly between stages. This is especially important in occupied homes, homes with open floor plans, and projects near kitchens or built-ins.
Dust control is not only about convenience. It also affects finish quality. Fine particles left on the floor can become trapped in the coating, creating a rough or speckled surface. A professional process helps produce a cleaner, smoother final result.
Hiring a pro saves time and disruption
Refinishing hardwood floors is labor-intensive. A DIY project can quickly stretch from a weekend into a week or more, especially if you are learning as you go. Renting equipment, buying supplies, moving furniture, sanding, cleaning, staining, coating, waiting between coats, and troubleshooting issues all take time.
A professional crew can usually complete the work more efficiently because they have the tools, materials, and workflow already in place. They know how to schedule each phase, how long products need to dry, and when the floor can safely handle socks, furniture, rugs, and normal traffic.
This is especially valuable if the floors are in essential areas such as bedrooms, hallways, stairs, kitchens, or the main living room. The faster the project is done correctly, the sooner your home can function normally again.
Professional results can protect your home’s value
Hardwood floors are often a major selling point. Buyers notice floors quickly because they shape the look and feel of the entire home. Well-refinished floors can make rooms feel cleaner, better maintained, and more move-in ready.
Poorly refinished floors can have the opposite effect. Visible sanding lines, inconsistent stain, peeling finish, or rough texture can make buyers question the quality of other work in the home. Even if you are not planning to sell soon, professional wood floor refinishing helps protect the long-term value of an important home feature.
Hardwood floor restoration can also be a more sustainable choice than replacement when the existing boards are structurally sound. Instead of removing and discarding old flooring, refinishing preserves the material and extends its useful life.
Professionals can repair problems before refinishing
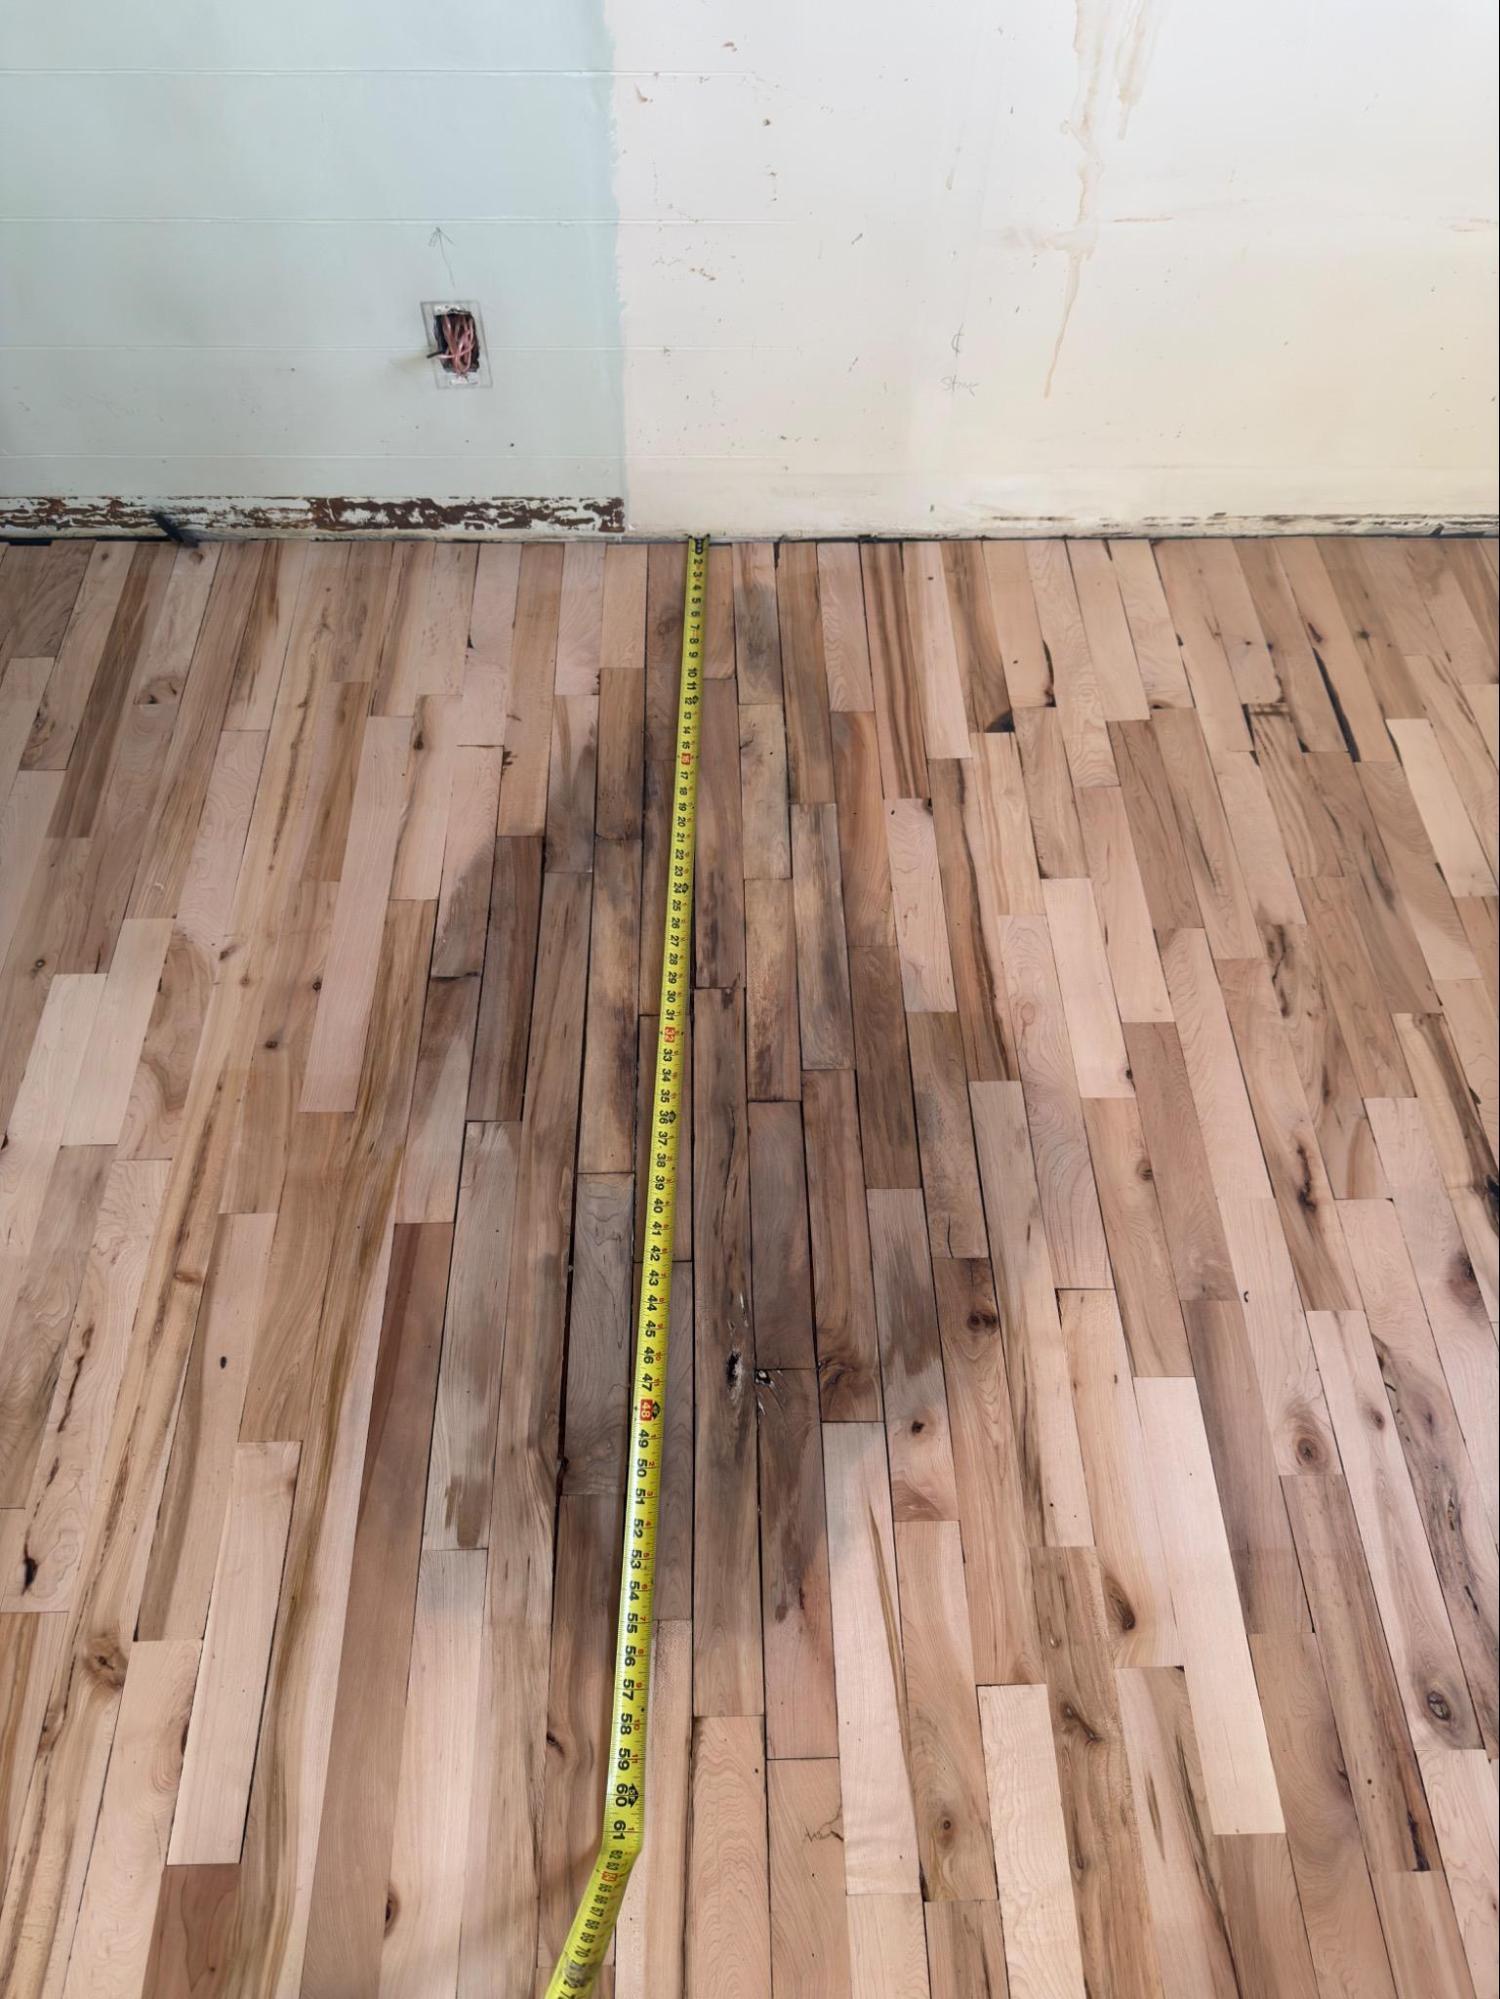
Before: Water damage that has penetrated deep into the wood often requires board replacement before refinishing.
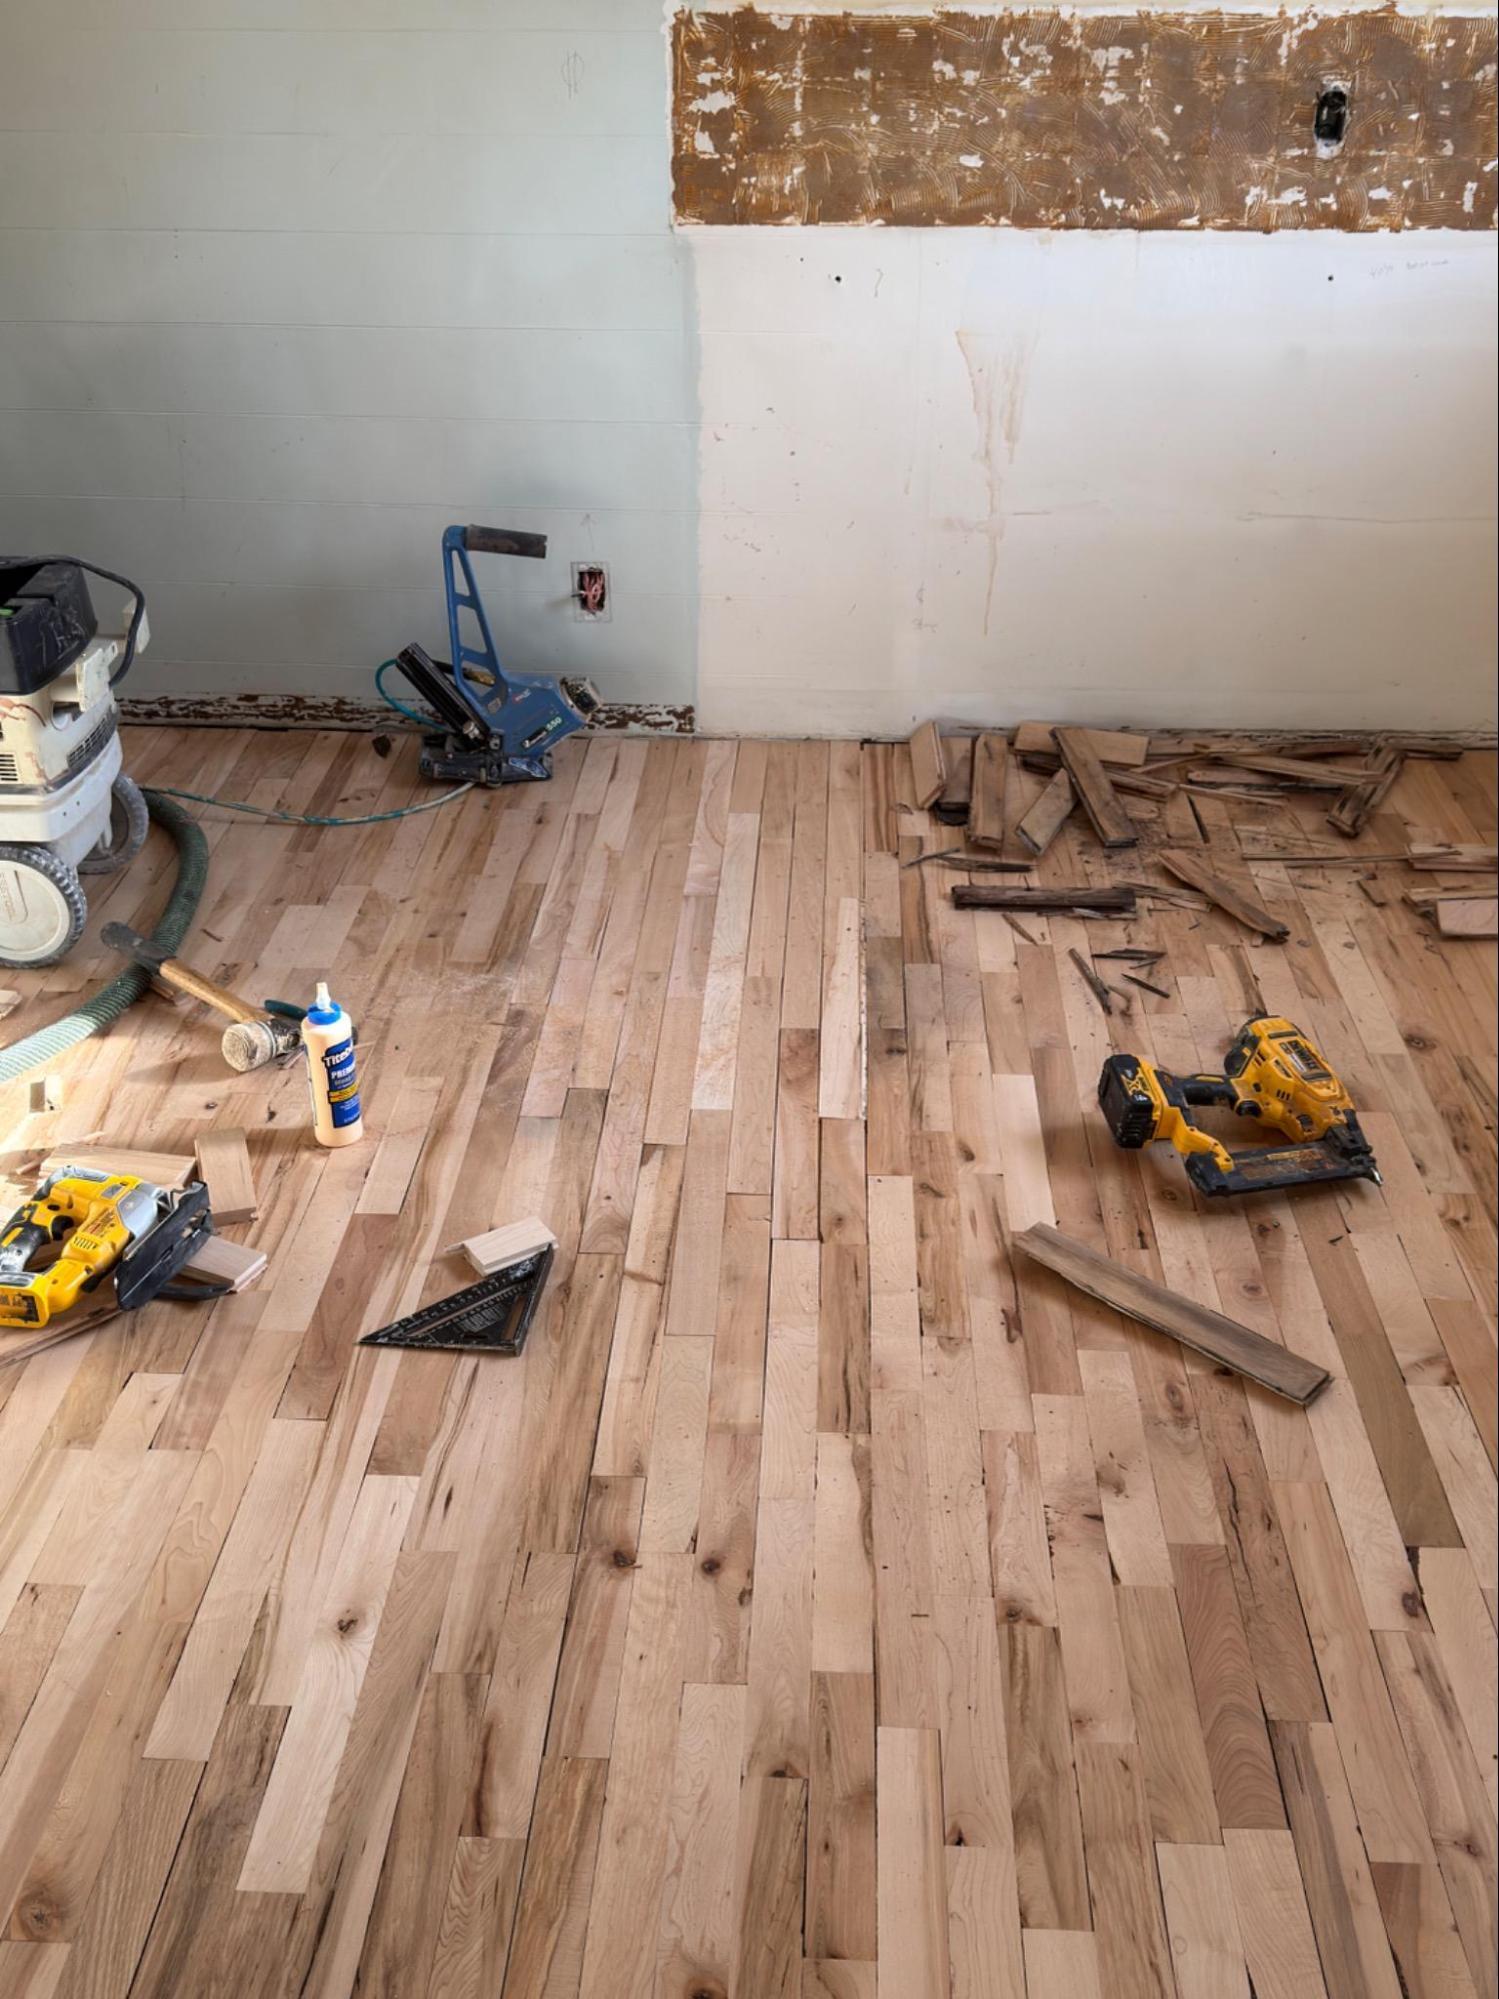
After: Carefully matched replacement boards blend naturally with the existing maple floor before refinishing.
Many floors need more than sanding and coating. A pro can often handle repairs before the refinishing process begins, creating a more complete result.
Common repair tasks may include:
- Replacing damaged boards
- Securing loose or squeaky areas
- Filling small nail holes or cracks
- Blending patches with surrounding flooring
- Addressing minor gaps where appropriate
- Repairing transitions between rooms
- Improving stair treads, landings, or thresholds
These repairs require experience because new wood may not match old wood perfectly. Grain, age, species, cut, and previous exposure to sunlight can all affect appearance. A professional can choose repair methods that blend as naturally as possible with the existing floor.
DIY may cost less upfront, but not always overall
The appeal of DIY refinishing is usually cost savings. At first, renting equipment and buying materials may seem less expensive than hiring a professional. But the full cost should include more than the rental receipt.
A DIY project may involve:
Sander and edger rental fees
Abrasive belts, discs, screens, and pads
Stain, finish, applicators, brushes, rollers, and trays
Safety gear, plastic sheeting, tape, vacuums, and cleanup supplies
Extra material if mistakes happen
Additional rental days if the project takes longer than expected
Time away from work, family, or other responsibilities
Possible professional correction if the result is unsatisfactory
For a small, hidden room, DIY might be reasonable for a careful homeowner. For large areas, open layouts, stairs, expensive hardwood, engineered floors, or a home you want to showcase, the professional route often delivers better value.
Safety and ventilation matter
Refinishing products and sanding dust require careful handling. Some stains and finishes produce strong odors or fumes. Dust can irritate lungs and eyes. Improper disposal of certain oil-soaked rags may create a fire hazard if they are not handled correctly.
Professionals understand jobsite safety. They know when ventilation is needed, how to store and dispose of materials, which protective equipment to use, and how to reduce risks during application and drying. This is especially important for households with children, pets, older adults, or anyone sensitive to odors and airborne particles.
When you should definitely call a professional
Some projects are better left to experienced hardwood floor refinishers from the start. Consider hiring a pro if:
- Your floors are old, thin, historic, or previously refinished
- You have engineered hardwood and are unsure of the veneer thickness
- The floor has water damage, pet stains, cupping, or deep scratches
- You want to change the floor color significantly
- The project includes stairs, borders, inlays, or multiple rooms
- You need the new finish to match existing flooring
- You want a high-end matte, satin, or custom stained look
- You are preparing to sell your home
- You cannot afford visible mistakes in a main living area
- You need the project completed on a predictable schedule
A professional can also tell you when full refinishing is not necessary. In some cases, a screen-and-recoat may refresh the floor without sanding down to bare wood. In other cases, replacement may be more practical than restoration. Getting an expert opinion helps you avoid spending money on the wrong solution.
How to choose the right floor refinishing professional
Not all contractors use the same process or products, so it is worth asking questions before hiring. Look for a professional who communicates clearly, inspects the floor in person when possible, and explains what is included in the scope of work.
Helpful questions include:
- What type of sanding and dust containment equipment do you use?
- How will you determine whether my floors can be safely refinished?
- What repairs are included, and what would cost extra?
- Which stain and finish options do you recommend for my home?
- How many coats of finish are included?
- How long will the project take from start to finish?
- When can we walk on the floors, move furniture back, and place rugs?
- How should we clean and maintain the floors afterward?
- Do you provide samples or test areas before final color selection?
- Are you insured, experienced, and able to share examples of past work?
The lowest bid is not always the best choice. A careful, experienced refinisher may save you money in the long run by avoiding mistakes and delivering a finish that lasts.
What to expect during the process
Although every project is different, most professional refinishing jobs follow a clear sequence. First, the contractor prepares the space by moving or protecting items and removing trim pieces if needed. Then the floor is sanded in stages, starting with a coarser grit and progressing to finer grits. Edges and corners are blended into the main floor area.
After sanding, the floor is cleaned thoroughly. If stain is part of the project, samples may be reviewed before the final color is applied. Once the stain dries, the protective finish is applied in coats. Depending on the system, the floor may be lightly abraded between coats to promote smoothness and adhesion.
Your contractor should explain the timeline for drying and curing. Walking on the floor too soon, dragging furniture, laying rugs early, or using the wrong cleaning products can damage the new finish. Following aftercare instructions is one of the easiest ways to protect your investment.
How to maintain refinished wood floors
A professionally refinished floor can look beautiful for years with the right care. Maintenance does not need to be complicated, but consistency matters.
Good habits include:
- Sweep, dust mop, or vacuum regularly with a floor-safe attachment
- Wipe spills promptly with a soft cloth
- Use felt pads under furniture legs
- Place mats near exterior doors to reduce grit
- Avoid wet mopping or steam cleaning unless approved for your finish
- Keep pet nails trimmed to reduce scratches
- Lift furniture instead of dragging it
- Use cleaning products recommended for your specific finish
- Avoid wax, oil soaps, or harsh cleaners unless your floor system requires them
- Wait the recommended time before placing rugs on newly finished floors
A pro can also advise when to recoat the floor before the finish wears through to bare wood. Timely recoating can extend the life of the finish and delay the need for another full sanding.
Frequently Asked Questions
How long does it take to refinish hardwood floors? Most rooms take two to four days from start to finish, including sanding, staining, and multiple coats of finish with dry time in between. Larger homes, stairs, or dark stain colors that need extra drying time can extend the schedule. Your contractor should give you a specific timeline once they’ve seen the floor in person.
Can I stay in my home during refinishing? It depends on the size of the project and which rooms are affected. Many homeowners stay in the house if the work is limited to one or two rooms with good ventilation, but strong odors from oil-based products may make some people choose to be away during application and initial drying.
How soon can I walk on the floors or move furniture back? Light foot traffic in socks is often possible within 24 hours, but full cure time for the finish can take one to three weeks depending on the product. Rugs and heavy furniture should generally wait longer than everyday walking to avoid trapping moisture or leaving marks in a finish that hasn’t fully hardened.
Does refinishing work on engineered hardwood? Sometimes. It depends on how thick the top veneer layer is. A professional can measure this and tell you whether your floor can handle a full sand or if a lighter approach, like a screen-and-recoat, is a better fit.
What’s the difference between refinishing and recoating? Refinishing sands the floor down to bare wood and rebuilds the stain and finish from scratch. Recoating (screen-and-recoat) lightly abrades the existing finish and applies a fresh topcoat without full sanding. Recoating is faster and less expensive, but it only works if the floor hasn’t been worn through to bare wood.
How do I choose a stain color? Bring a few samples home and look at them in your actual lighting at different times of day, since stain color can look noticeably different under natural versus artificial light. It also helps to consider maintenance: darker tones show dust and scratches more readily, while lighter tones tend to hide daily wear better.
Will refinishing get rid of deep scratches or pet stains? Surface scratches typically sand out completely. Deep pet stains that have soaked into the wood fibers can sometimes lighten but not fully disappear, especially if the damage goes deeper than the sanding can safely remove. A professional can assess this before work begins so you know what to expect.
Ready to restore your floors?
If your hardwood floors are looking tired, scratched, or out of date, we’d be glad to take a look and walk you through your options. Contact us today to schedule a free in-home evaluation, we’ll assess your floors, answer your questions, and provide a clear estimate so you know exactly what to expect before any work begins.